Node & Mesh Commands
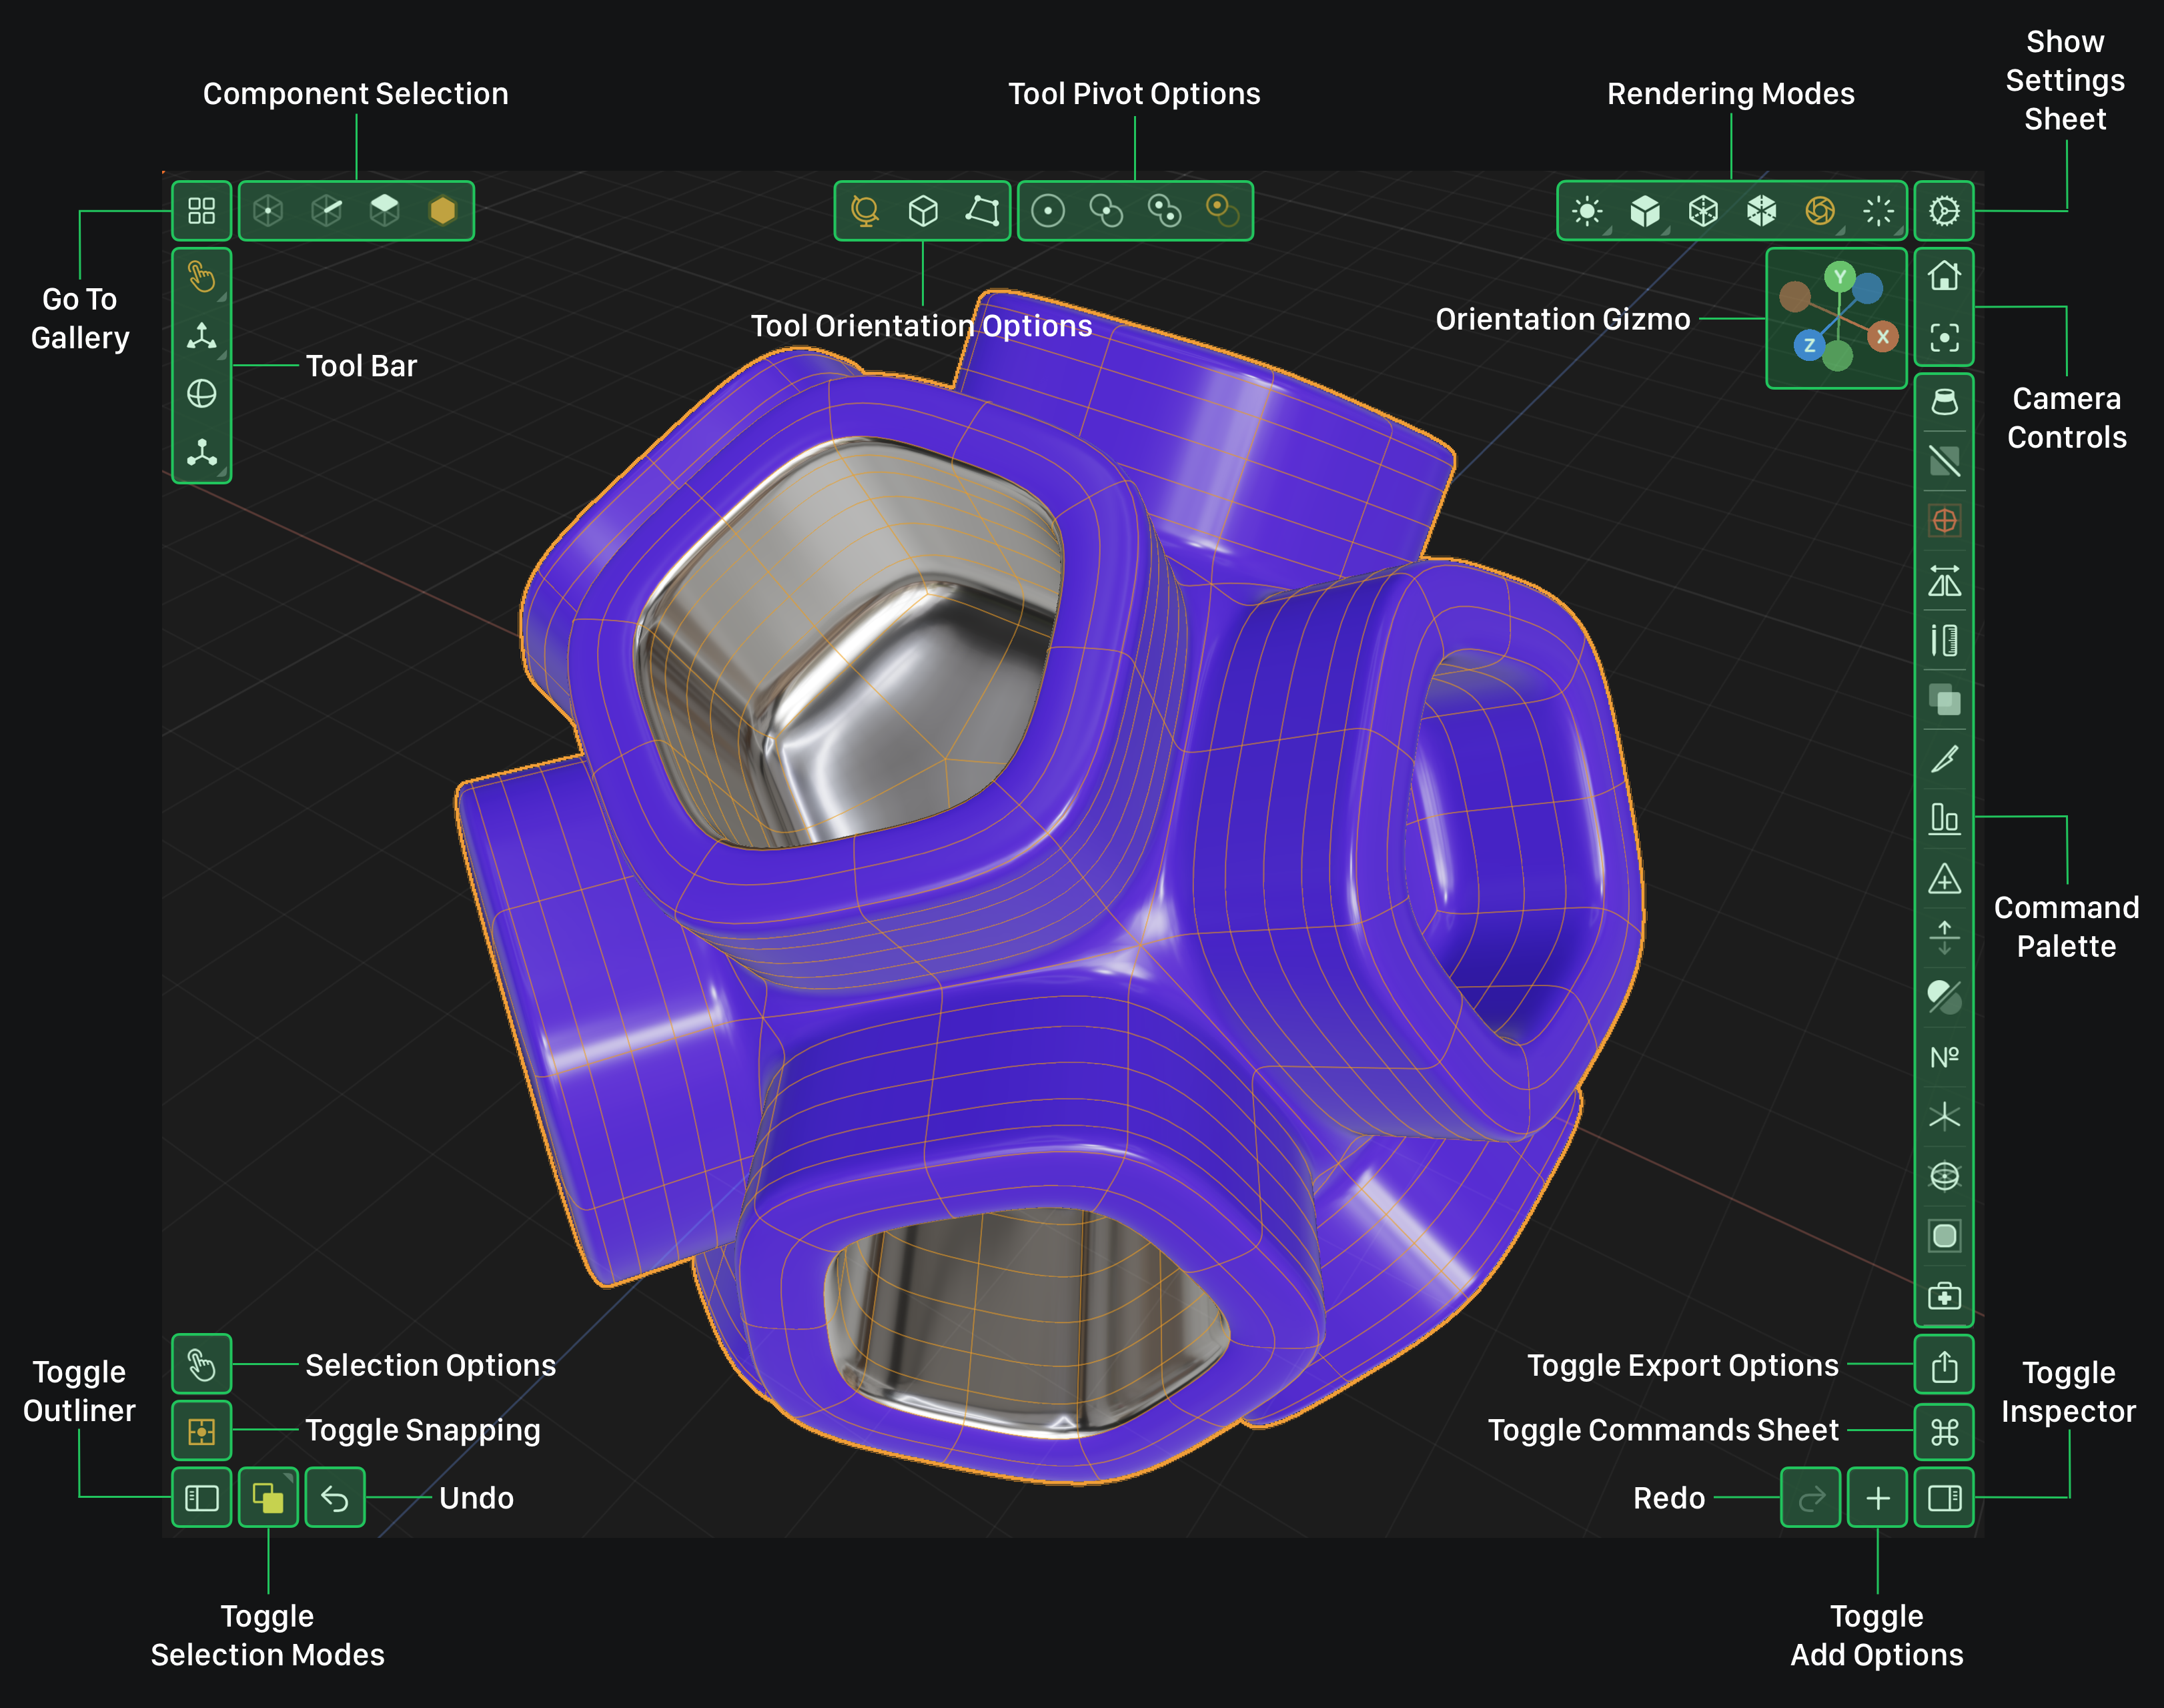
These commands allow you to perform complex operations on meshes and nodes. For example, you can smooth a mesh by using the Smooth Command. Or you can center a mesh's pivot by the center pivot command. These command are found in the Command Palette when the Component Selection is set to Mesh and you have a mesh or multiple meshes selected.The Command Palette is located on the right side of the screen right below the Camera Controls (see below).
Modeler Interface
Isolation Commands
Toggle Isolation
Toggle Isolation is a single command that isolates the selected mesh when the rest of the scene is visible, and restores the scene when you are already isolated. The button's icon and color tell you which it will do.
Tap this button to isolate (solo) the selected mesh and make the rest of the scene invisible and locked.
Tap this button to de-isolate and unlock the rest of your scene and make it visible again.
Selection Commands
Clear Selection
Tap this button to clear the selection.
Modifier Commands
Toggle Subdivision Modifier
One command both adds and removes the Subdivision Modifier. The button is red when the selected mesh already has the modifier, meaning tapping it will remove it.
Tap this button to add a subdivision modifier to the selected mesh.
Tap this button to remove the subdivision modifier from the selected mesh.
Toggle Mirror Modifier
One command both adds and removes the Mirror Modifier. The button is red when the selected mesh already has the modifier, meaning tapping it will remove it.
Tap this button to add a mirror modifier to the selected mesh.
Tap this button to remove the mirror modifier from the selected mesh.
Information Commands
Toggle Measurements
Tap this button to toggle measurements.
Node Commands
Duplicate
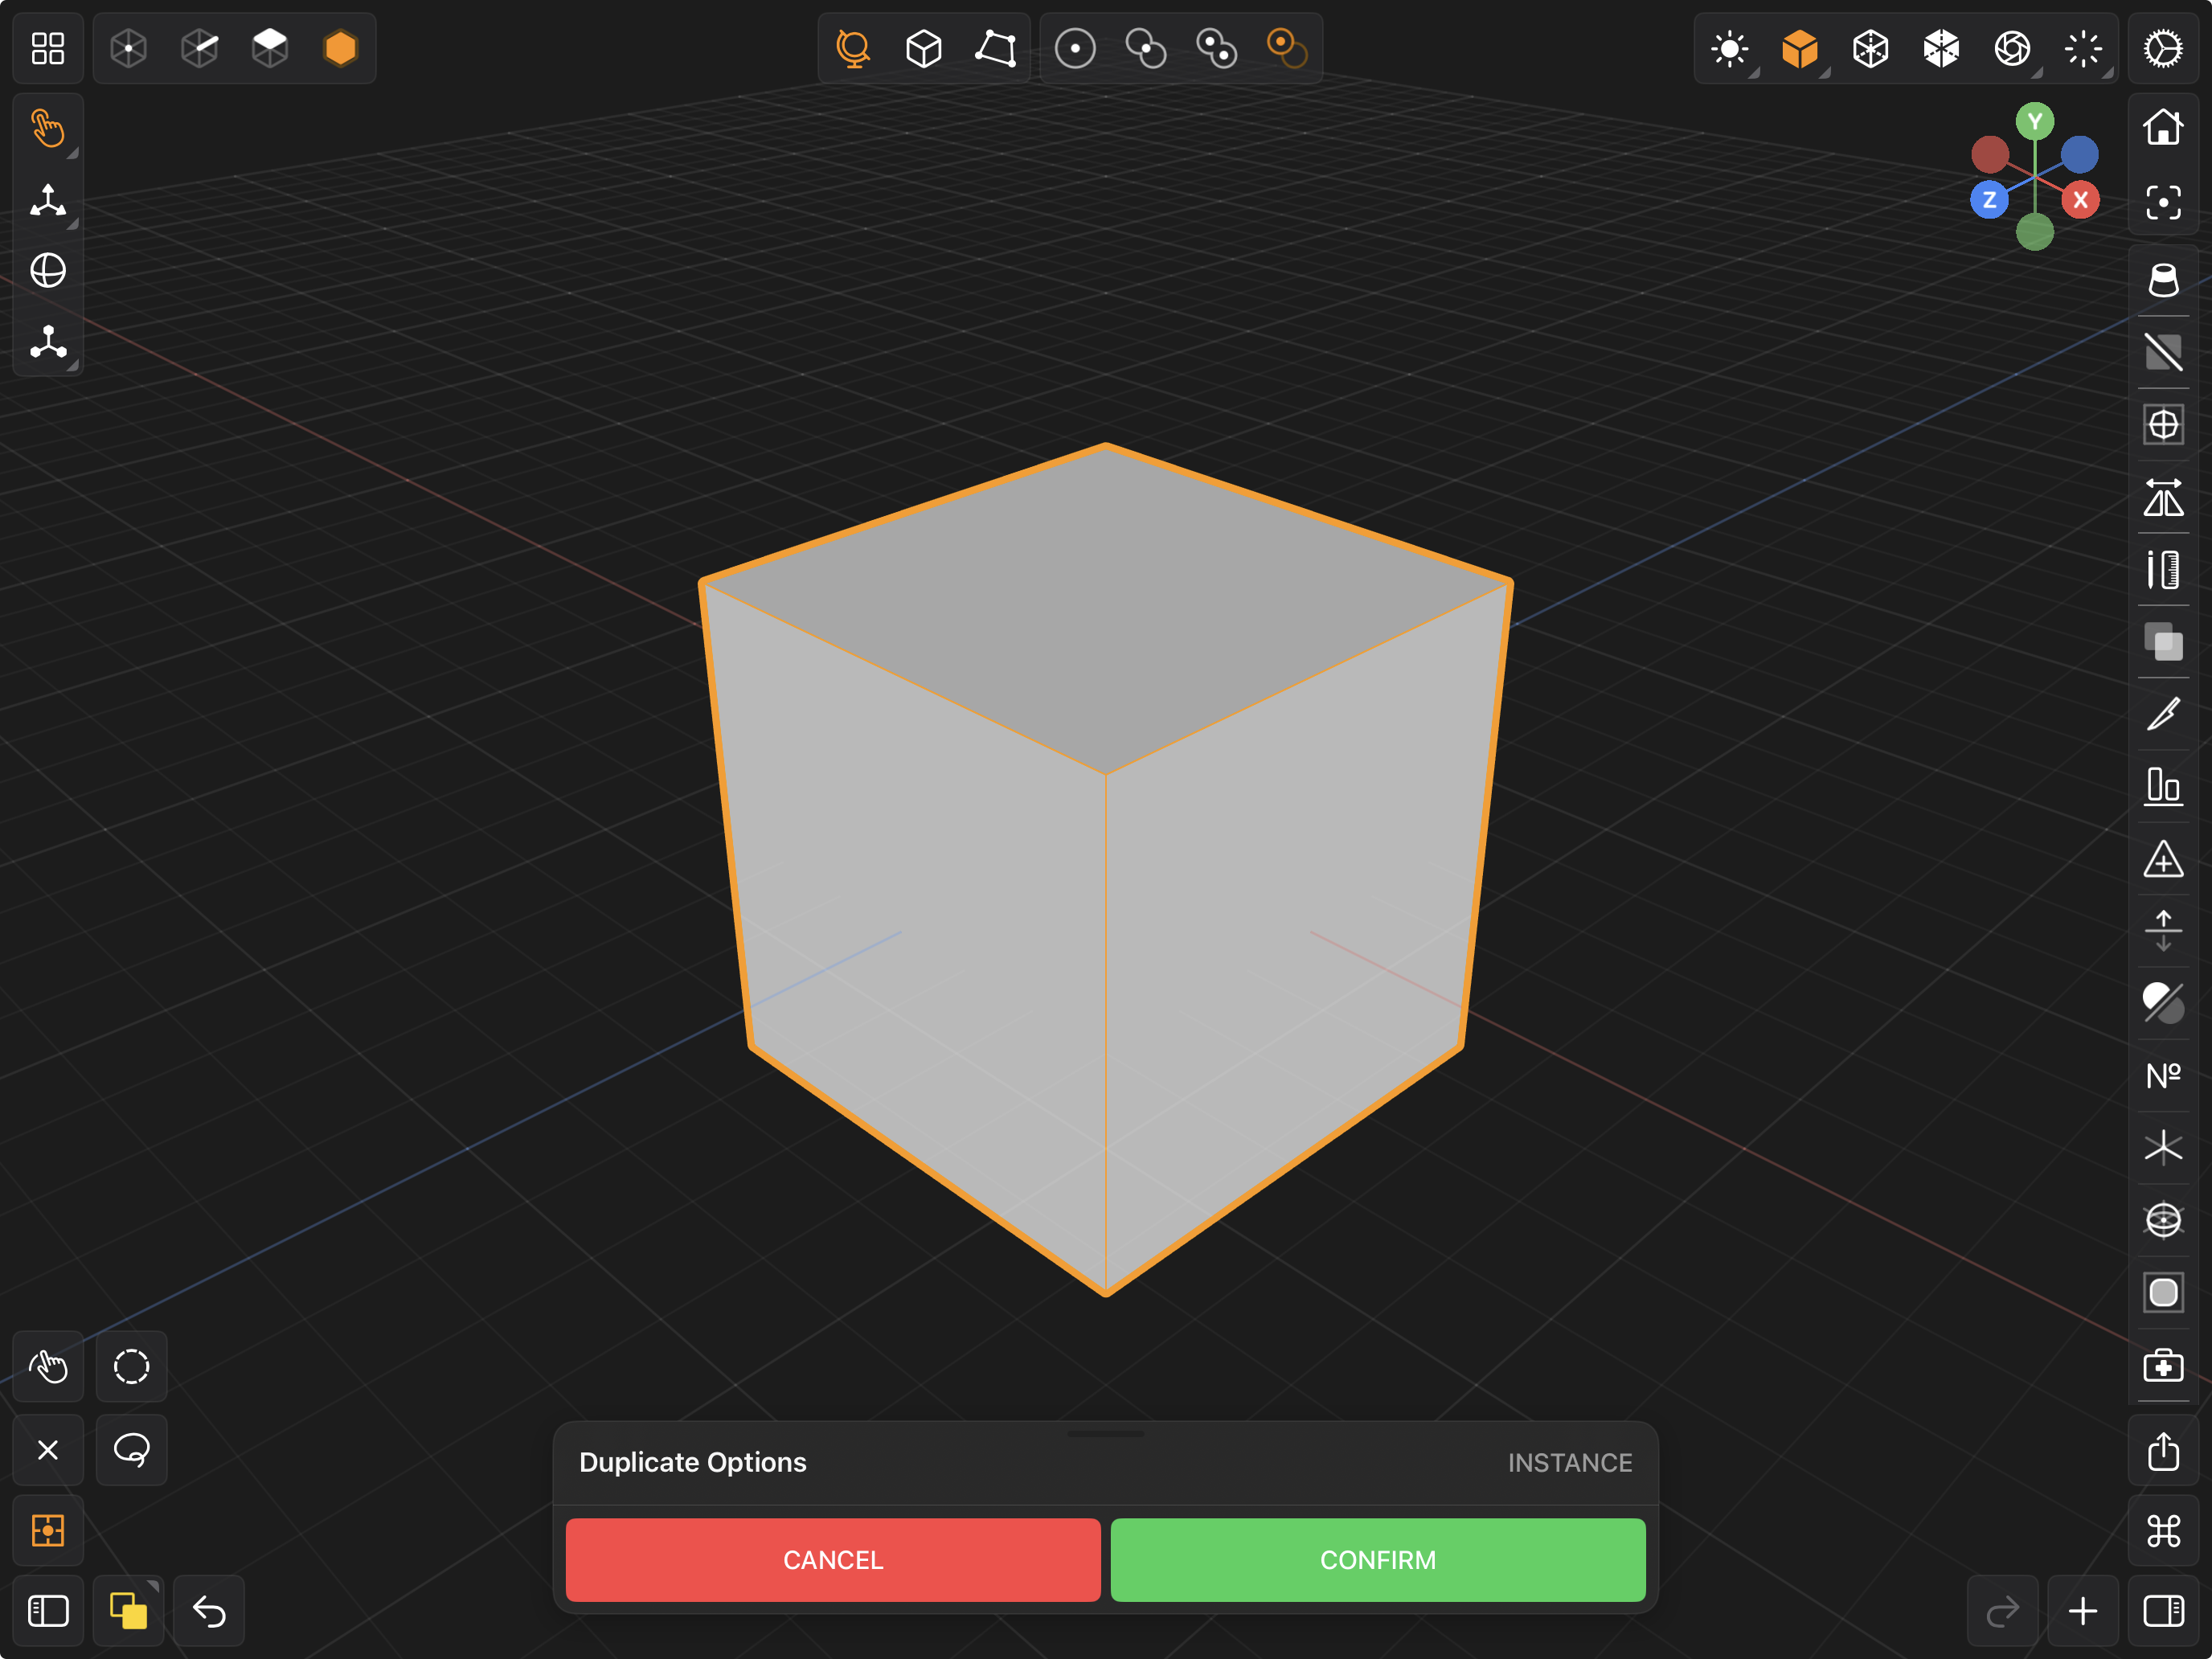
Tap this button to duplicate the selected node(s) or mesh(es).
This opens the Duplicate Options sheet. Turn INSTANCE on to create an instance that shares the original's geometry instead of an independent copy. Instances can be separated later with Detach Instance in the Outliner.
Duplicate Options
Mesh Commands
Knife Tool
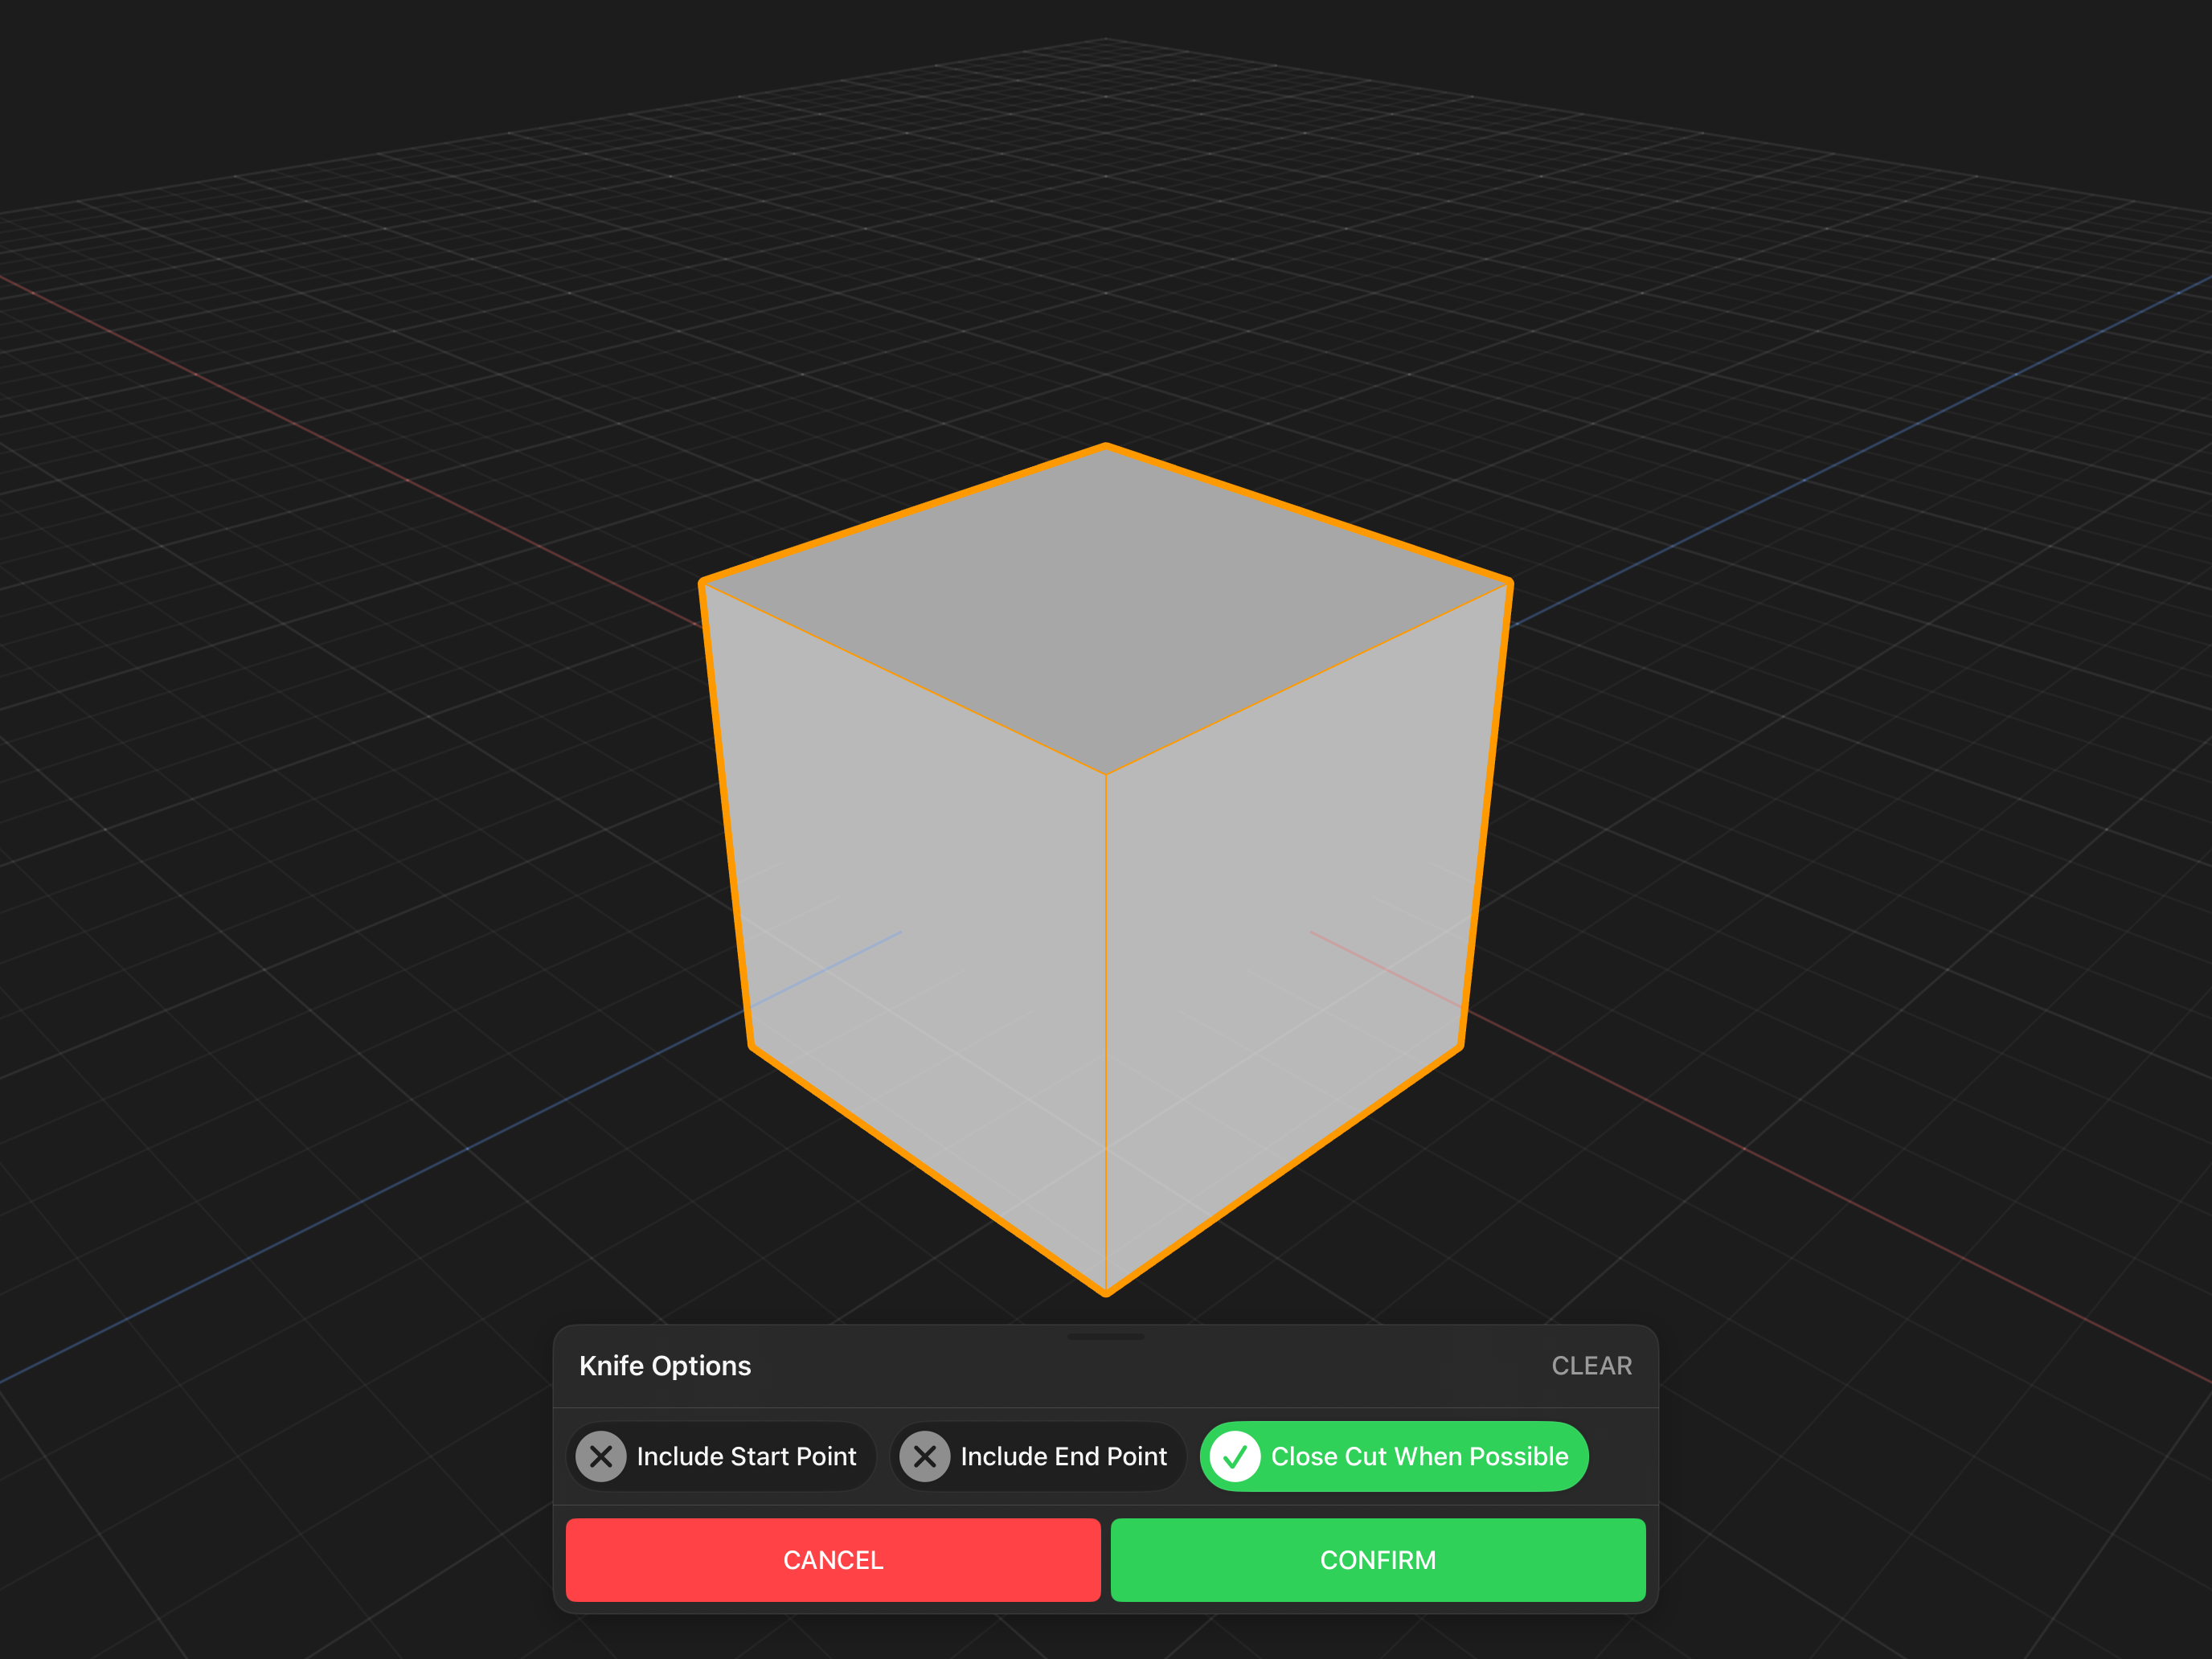
Tap this button to activate the knife and touch and drag across faces to cut.
The Knife Options sheet has three toggles and a CLEAR button that discards the cut you have drawn so far:
- Include Start Point — keeps the first point of the cut. Off by default, which trims the cut back to the first edge it crosses. Only applies when the cut has more than two points.
- Include End Point — keeps the last point of the cut. Off by default.
- Close Cut When Possible — on by default. When the cut's two ends can be joined into a closed loop, Valence 3D closes it for you.
Knife Options
Align
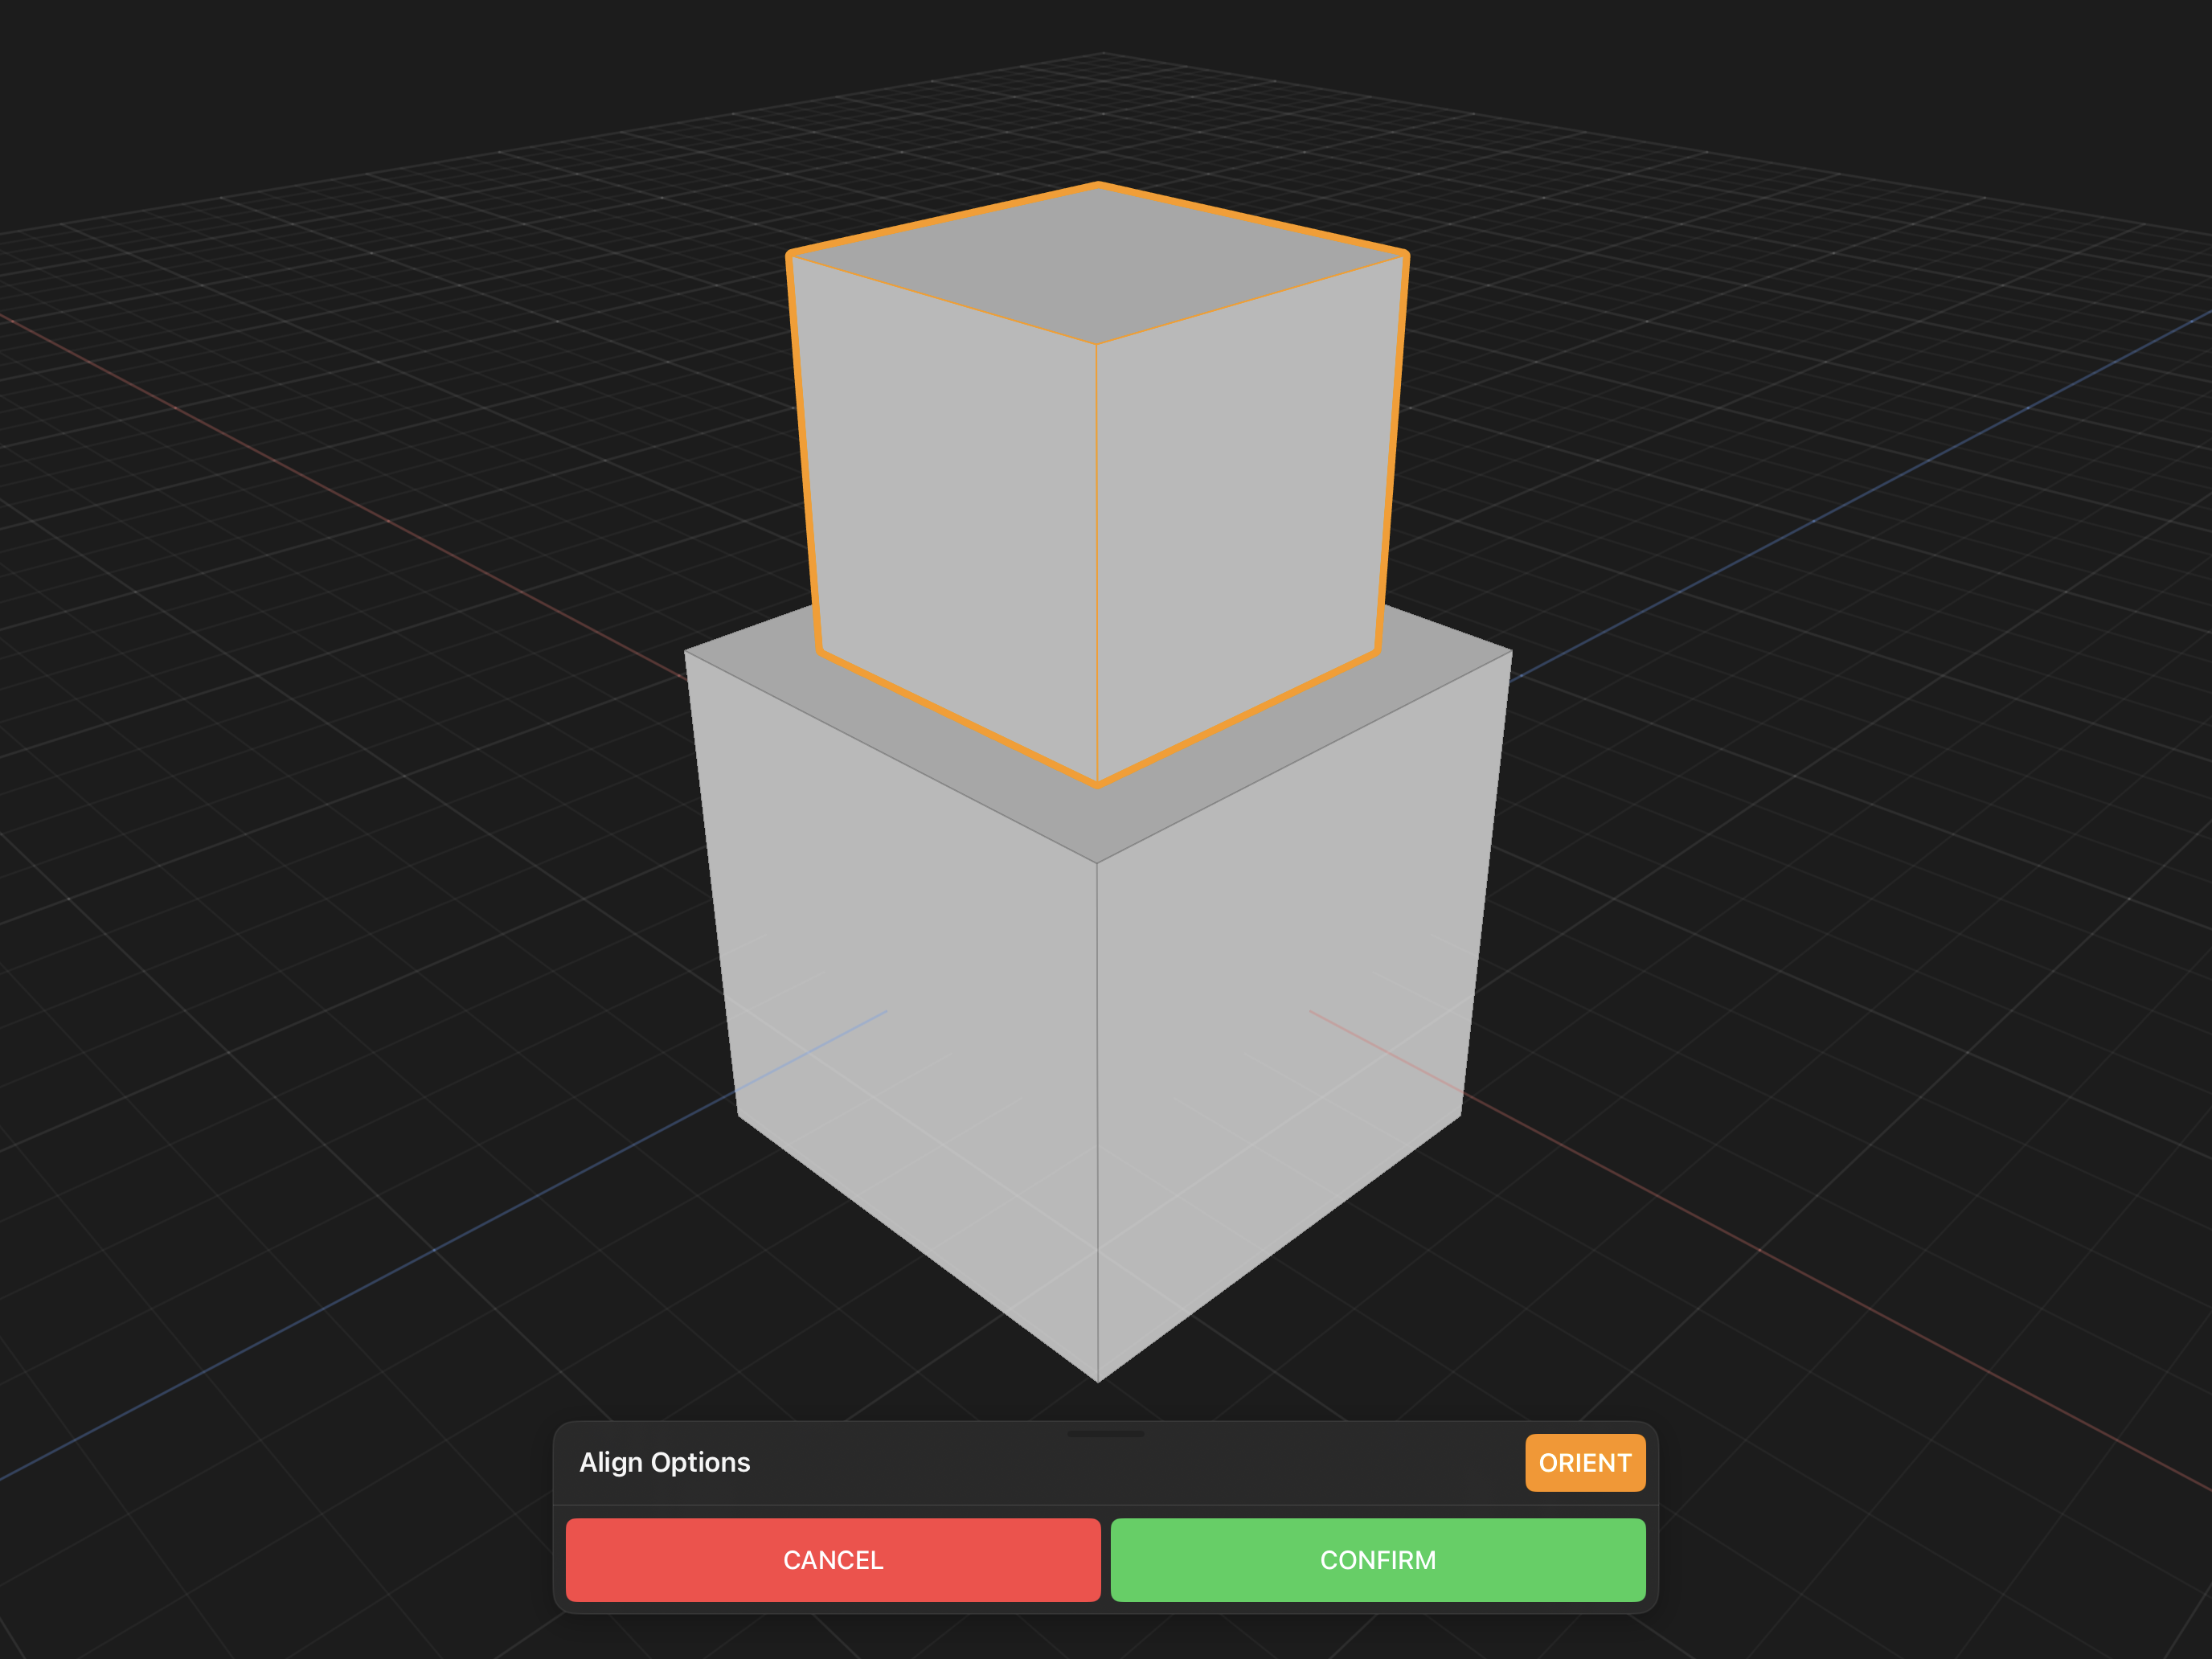
Tap this button to activate alignment mode. Then tap or drag on another mesh to align the selected edge to that mesh's surface.
The Align Options sheet has one option, ORIENT, which is on by default. When ORIENT is on, the selected mesh is both moved to the target and rotated so it points along the target's normal. Turn ORIENT off to move the mesh to the target without changing its rotation.
Align Options
Triangulate
Tap this button to triangulate the faces in the selected mesh. Triangulation converts a polygon into a set of triangles.
Flip Normals
Tap this button to flip all the normal(s) of the selected mesh's faces.
Combine Meshes
Tap this button to combine two meshes into one.
Combine Meshes only shows up when you have at least two meshes selected.
Boolean
Tap this button to activate boolean mode.
Boolean only shows up when you have at least two meshes selected.
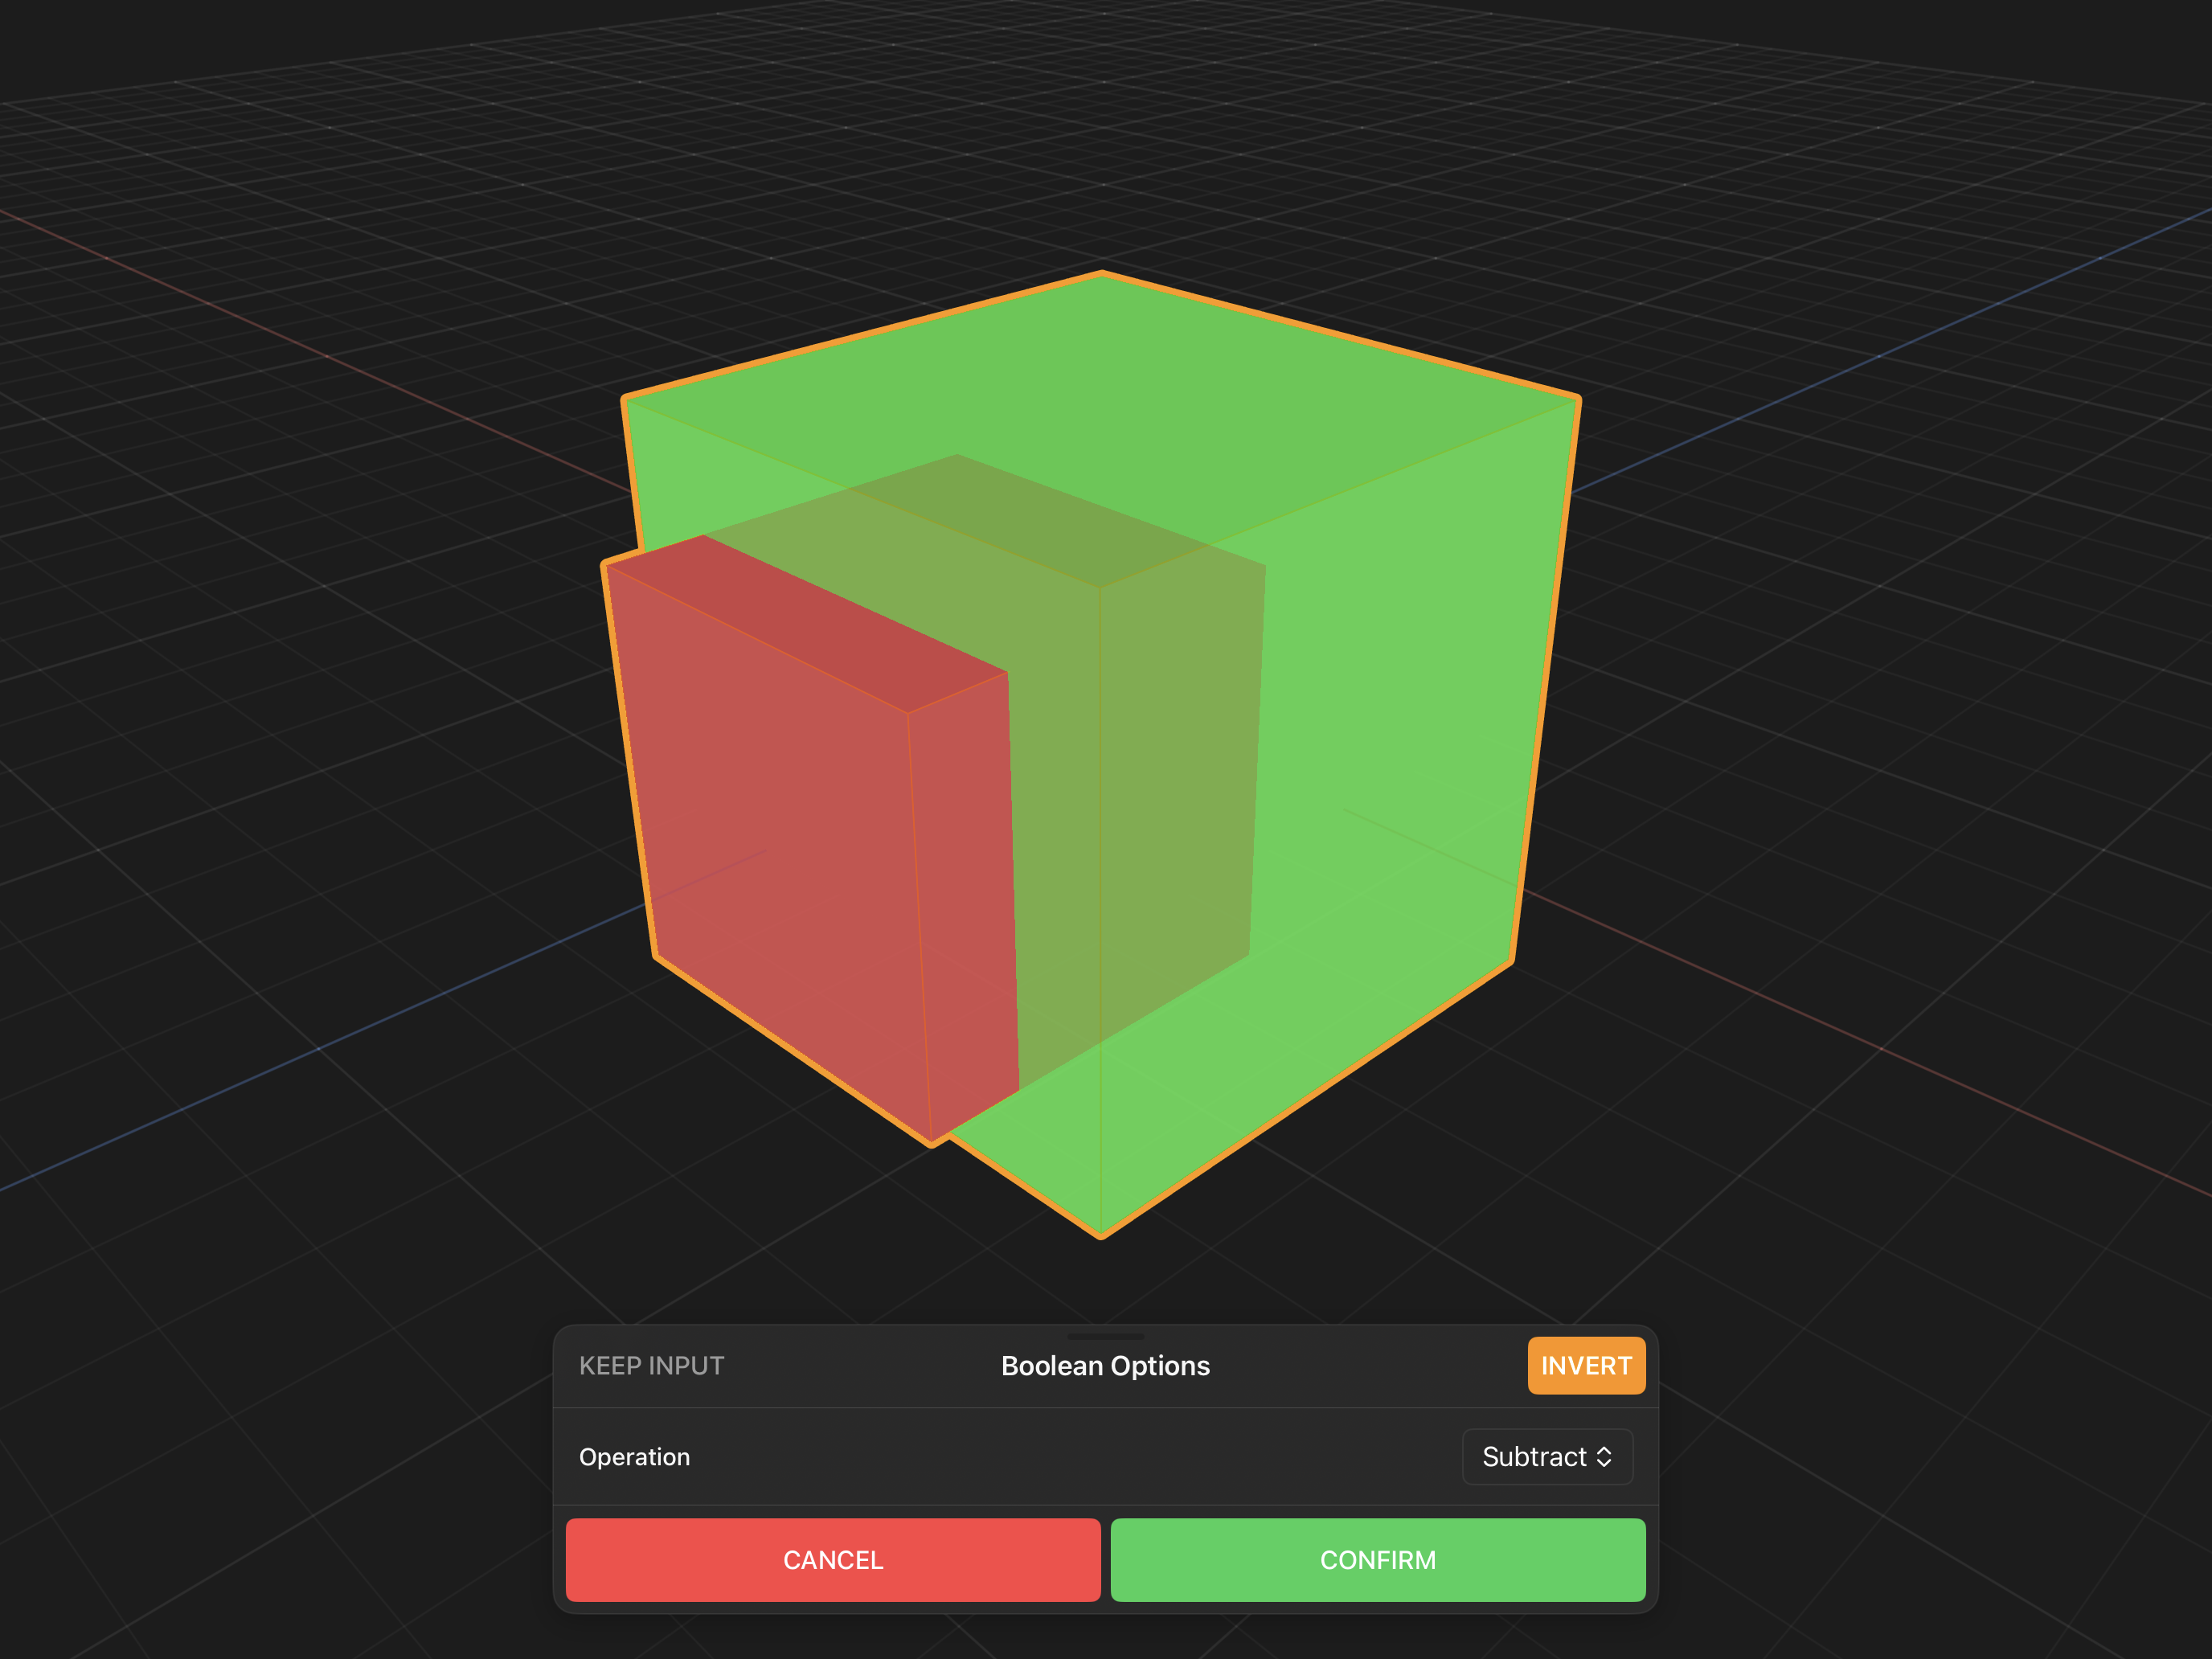
In boolean mode the two input meshes are previewed in green and red. The Boolean Options sheet offers:
- Operation — Add (union), Subtract (remove the second mesh from the first) or Intersect (keep only the overlap).
- INVERT — swaps which mesh is treated as the first and which as the second. This changes the result of Subtract.
- KEEP INPUT — keeps the two input meshes in the scene instead of replacing them with the result.
Boolean Options
Trim By Plane
Tap this button to activate trim by plane mode.
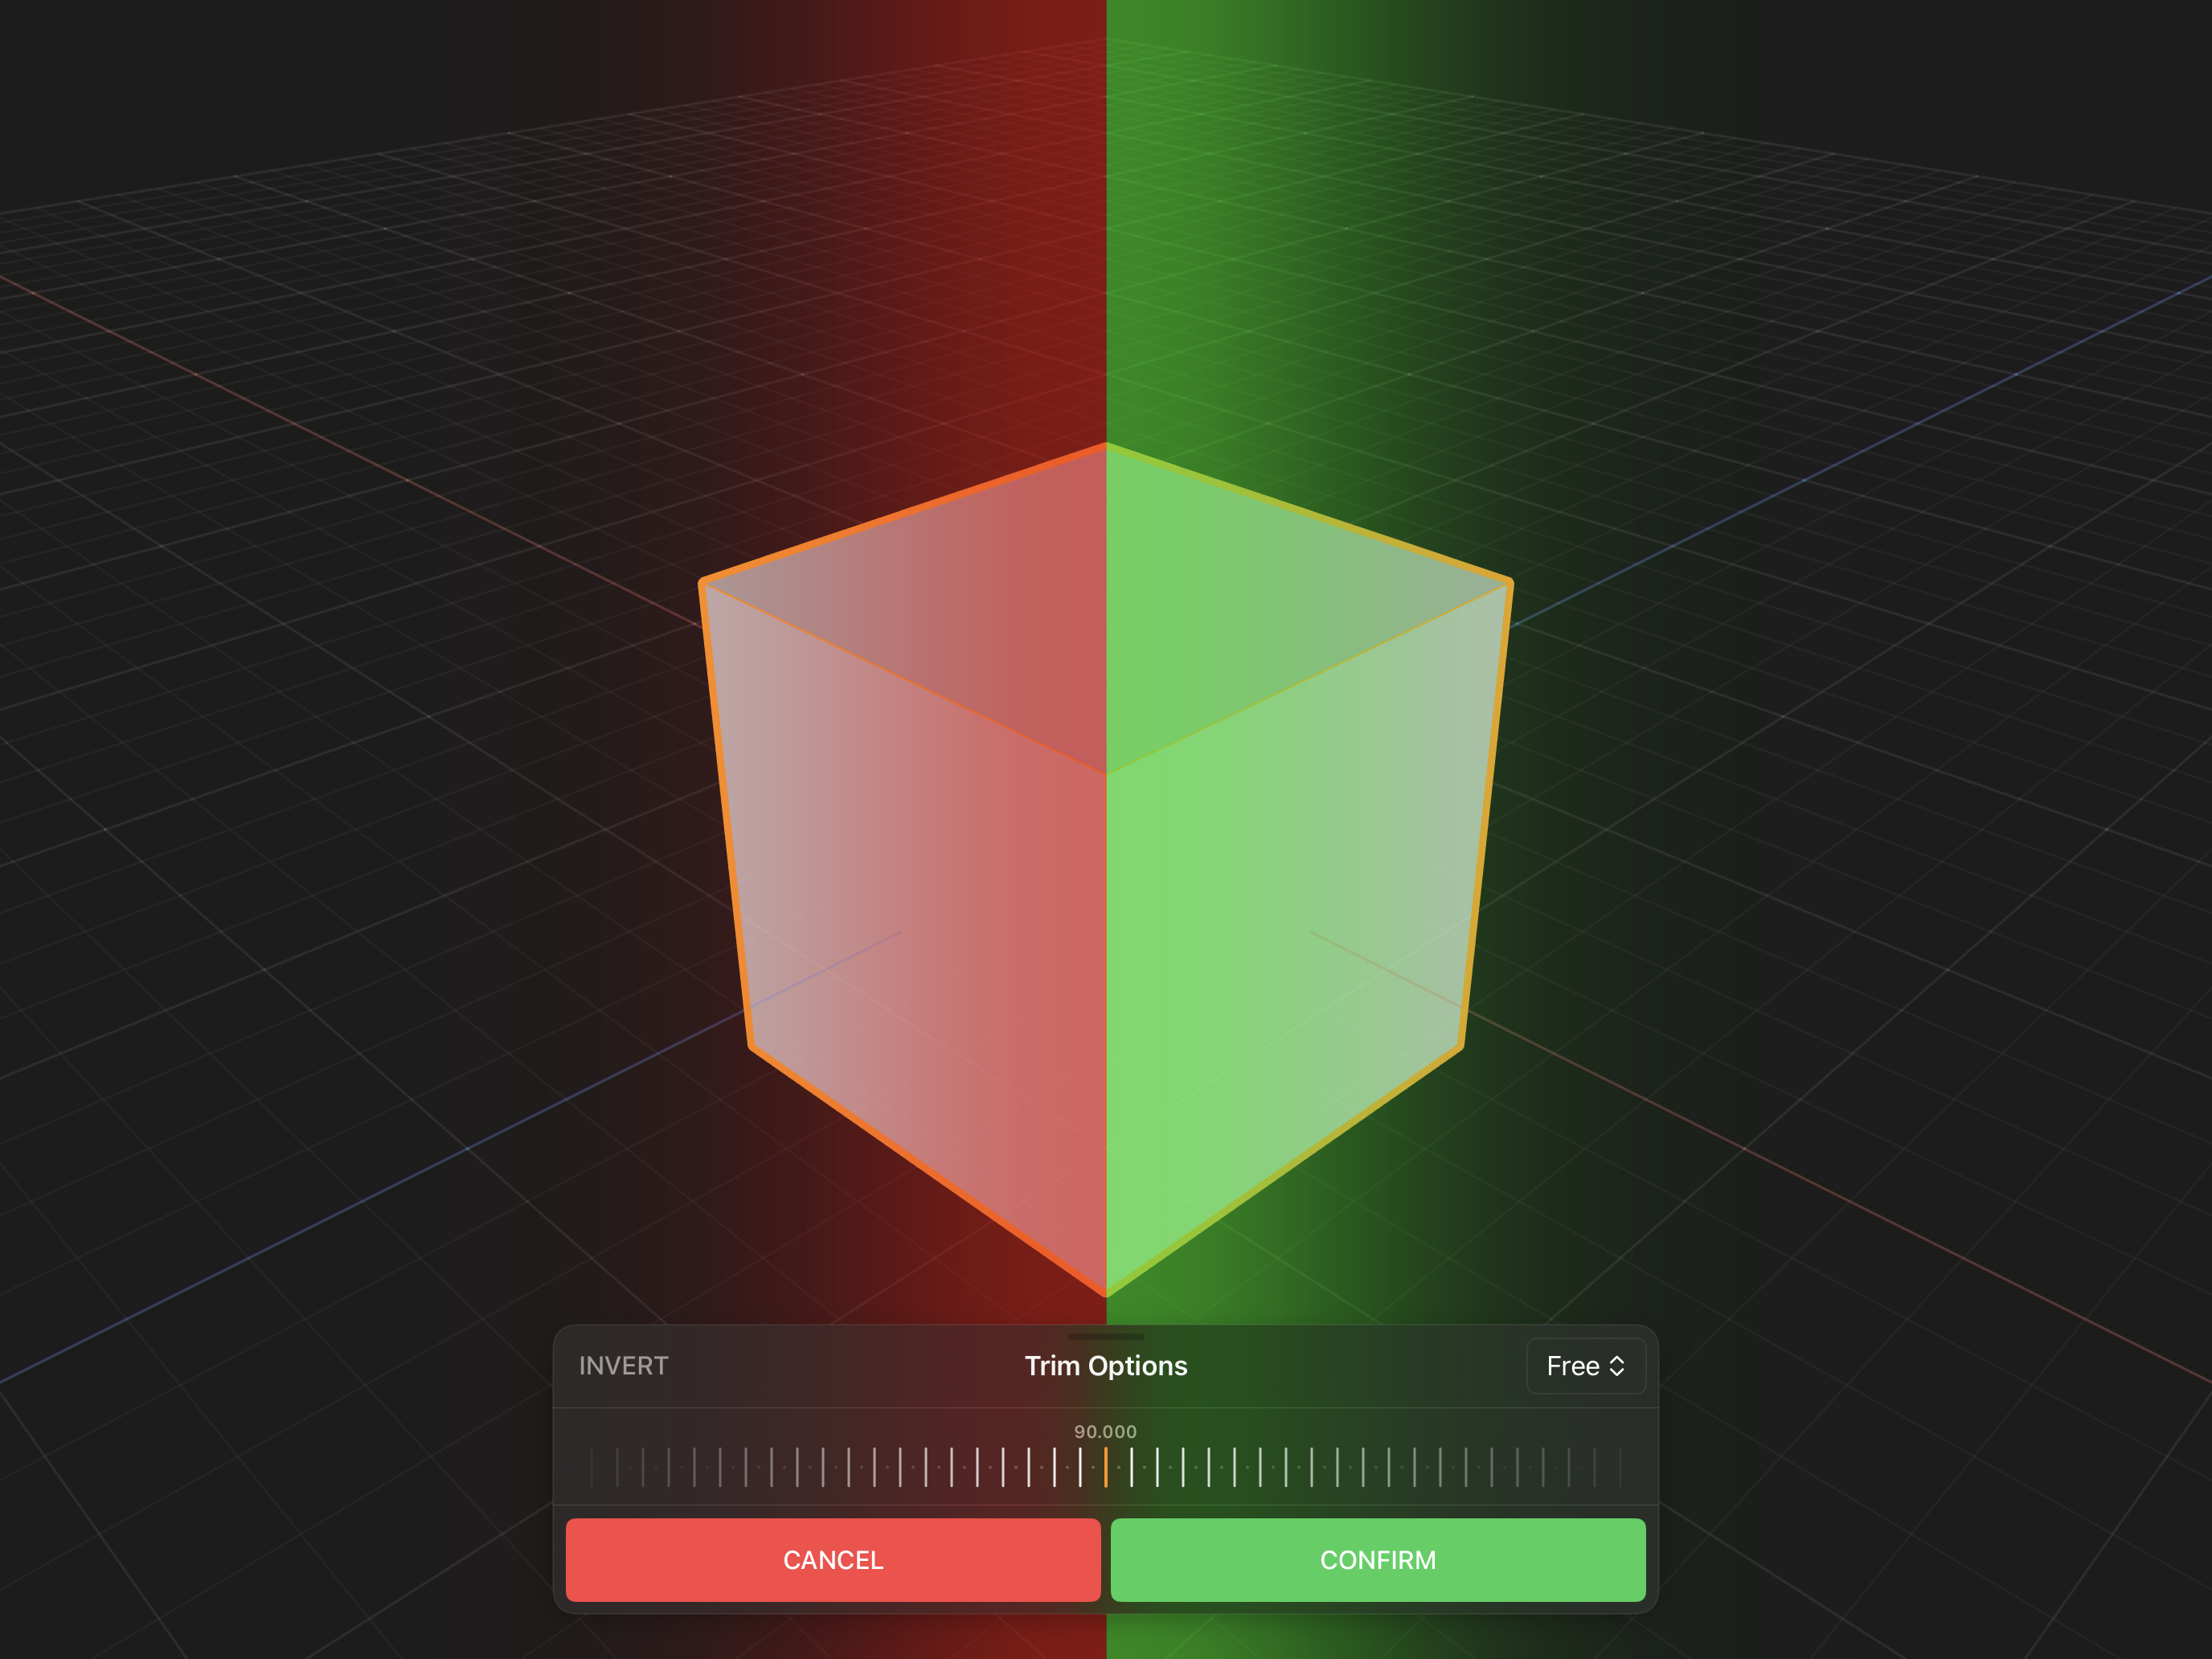
The green side of the plane is kept and the red side is removed. The Trim Options sheet gives you:
- INVERT — swaps which side of the plane survives.
- A view drop down on the right — Free, or one of the orthographic Front, Back, Top, Bottom, Left and Right views. Snapping the camera to an orthographic view makes it much easier to place the plane precisely.
- A rotation slider — drag it to rotate the cutting plane, from -360 to 360 degrees.
Trim Options
Apply Transform
Tap this button to apply the selected mesh's transform.
Set Pivot
Tap this button to activate set pivot mode.
Center Pivot
Tap this button to center a mesh's pivot.
Smooth
Tap this button to smooth or subdivide a mesh.
Smooth permanently subdivides the mesh, unlike the Subdivision Modifier, which previews a smooth surface non-destructively.
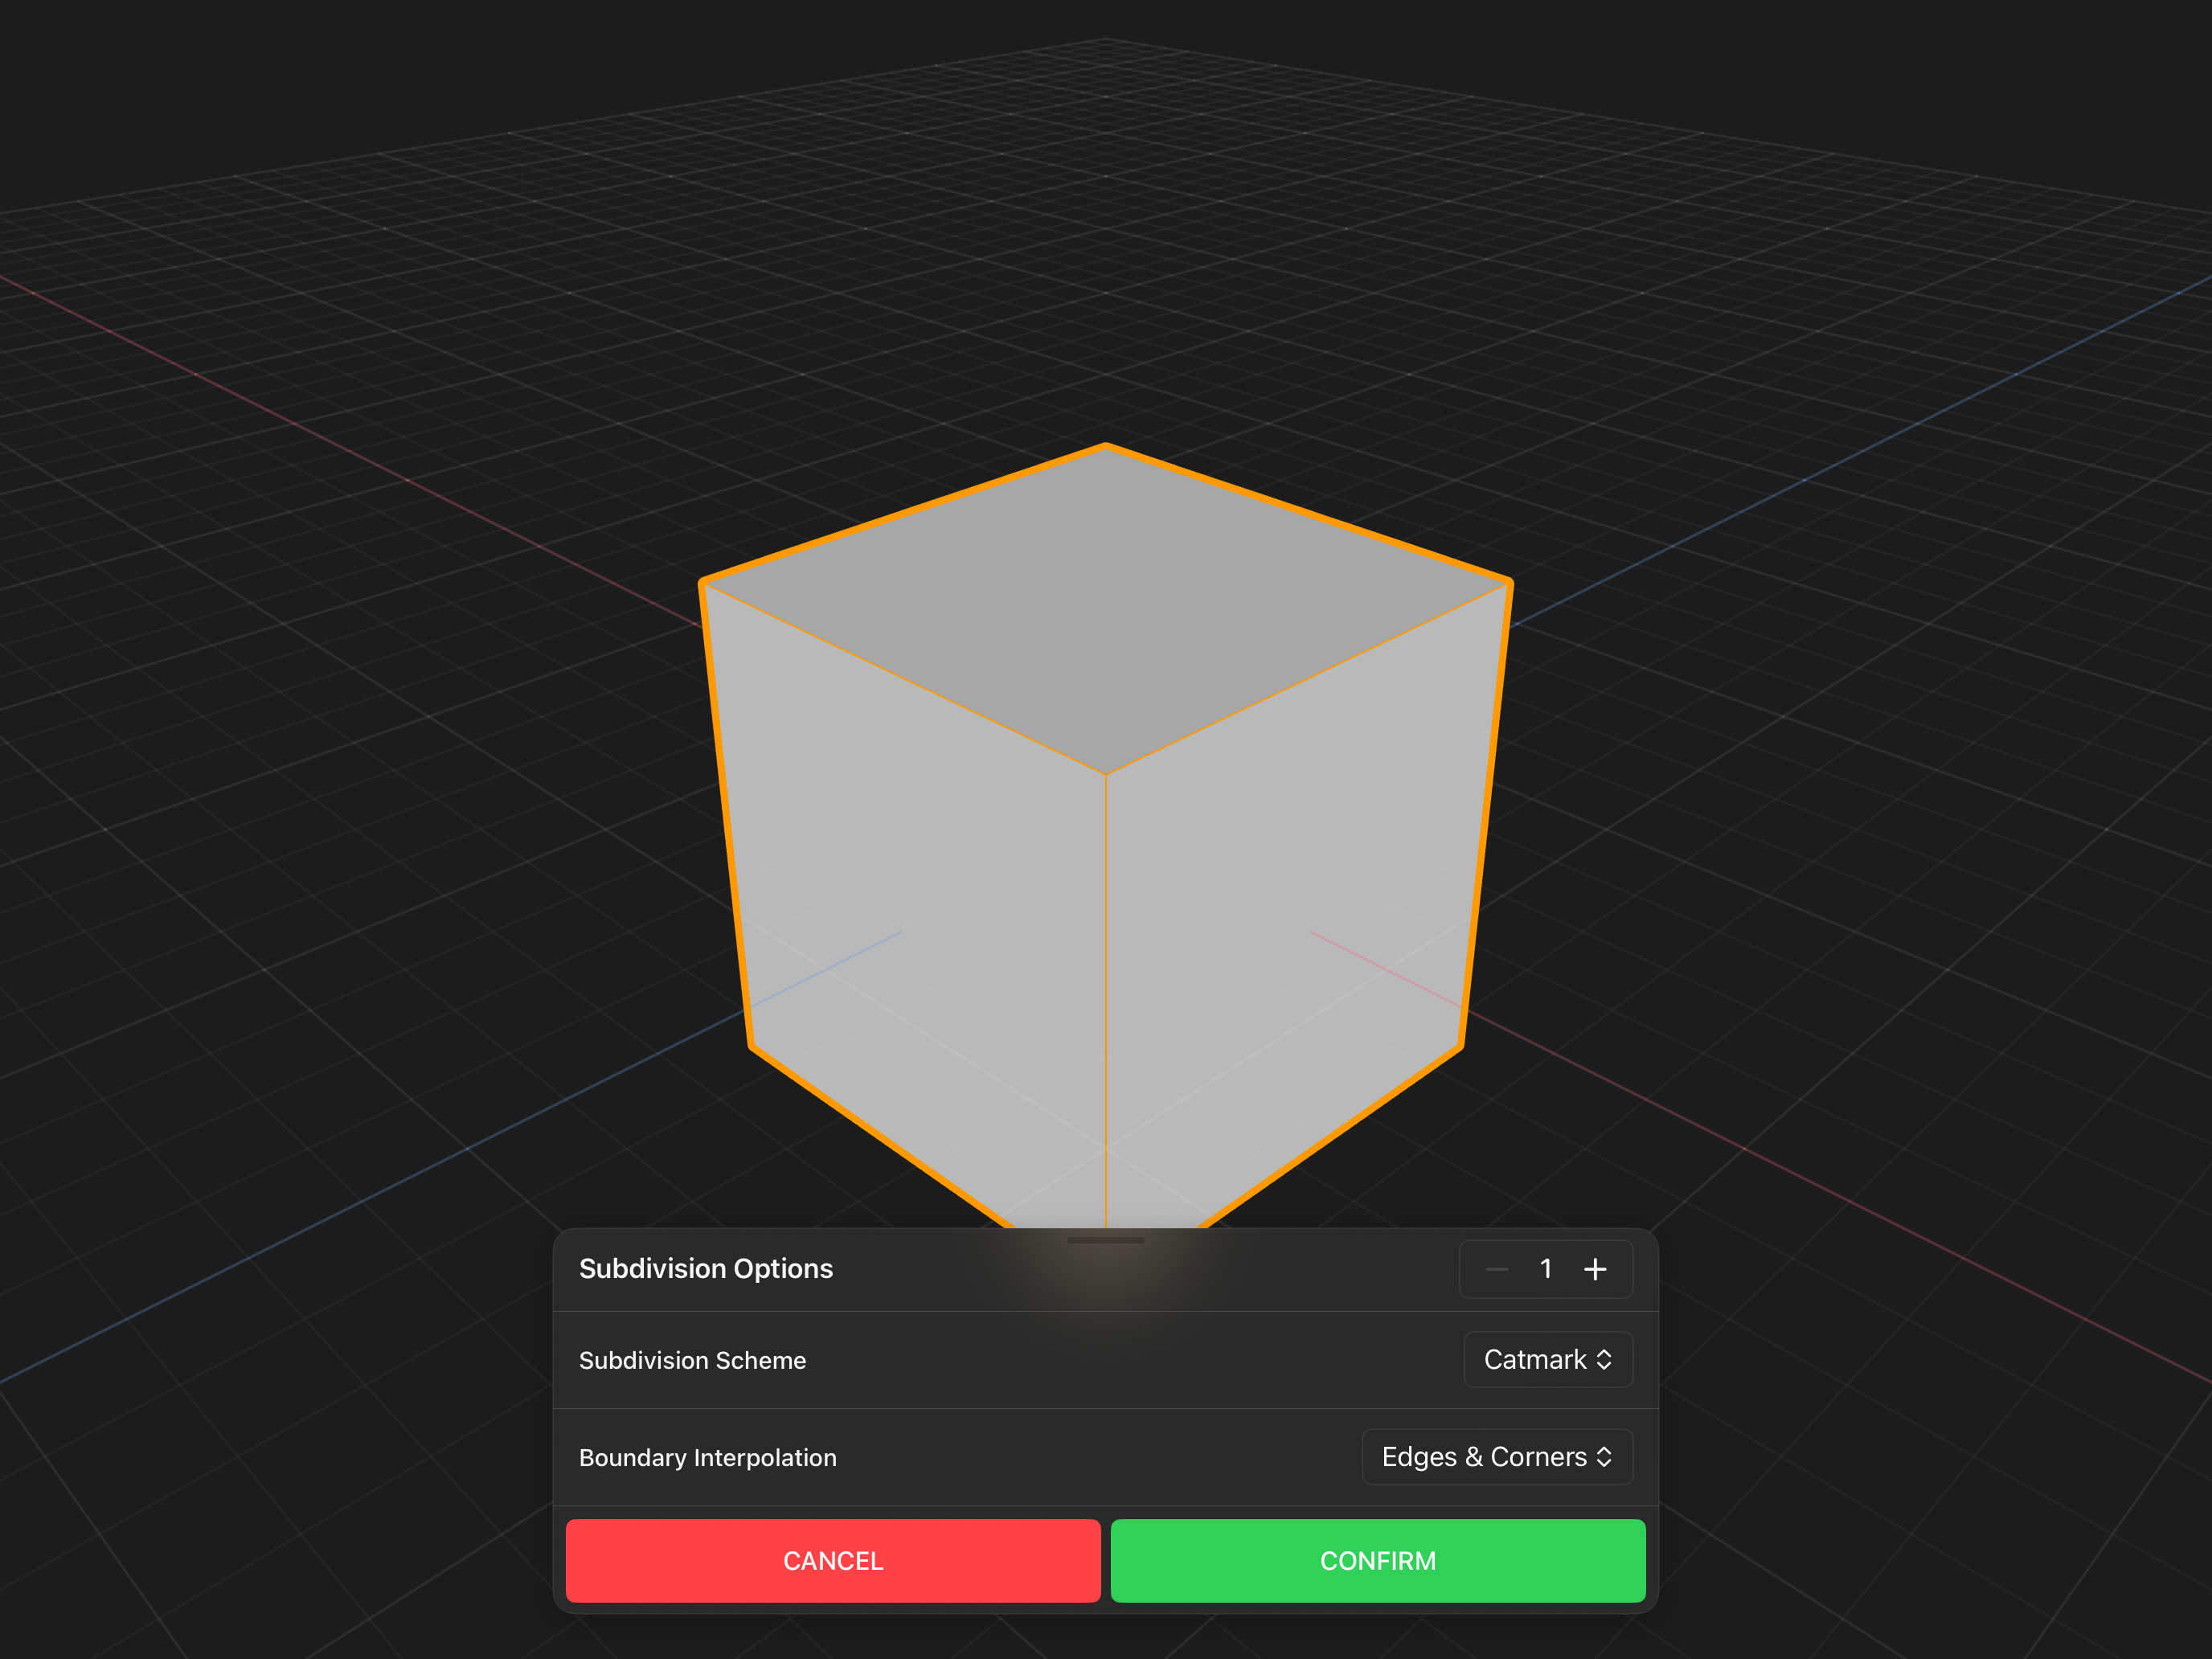
The Subdivision Options sheet offers:
- Level — how many times to subdivide, from 1 to 4. Each level multiplies the polygon count, so raise it carefully.
- Subdivision Scheme — Catmark (Catmull-Clark, the default) produces a smooth rounded surface; Bilinear simply splits each face without smoothing it.
- Boundary Interpolation — how open boundary edges are treated: None, Edges, or Edges & Corners.
Subdivision Options
Repair Mesh
Tap this button to repair a mesh.
Shading Commands
Shade Smooth
Tap this button to shade the selected mesh(es) smooth.
Shade Smooth renders the mesh using vertex normals, so curved surfaces look rounded rather than faceted. This is the same setting as the SHADE SMOOTH toggle in the Inspector's Display Options, applied to every selected mesh at once.
Shade Flat
Tap this button to shade the selected mesh(es) flat.
Shade Flat renders the mesh using face normals, so every face reads as a distinct facet. This is the default for new meshes.
Harden Normals
Tap this button to harden all faces in the mesh.
Soften Normals
Tap this button to soften all faces in the mesh.
Destructive Commands
Delete
Tap this button to delete the selected node(s) or mesh(es).