Units & Measurements
When you create a new file in Valence 3D, by default its units are centimeters. This means that 1 grid unit equals 1 centimeter. You can change this using the Scene Inspector.
Scene Inspector
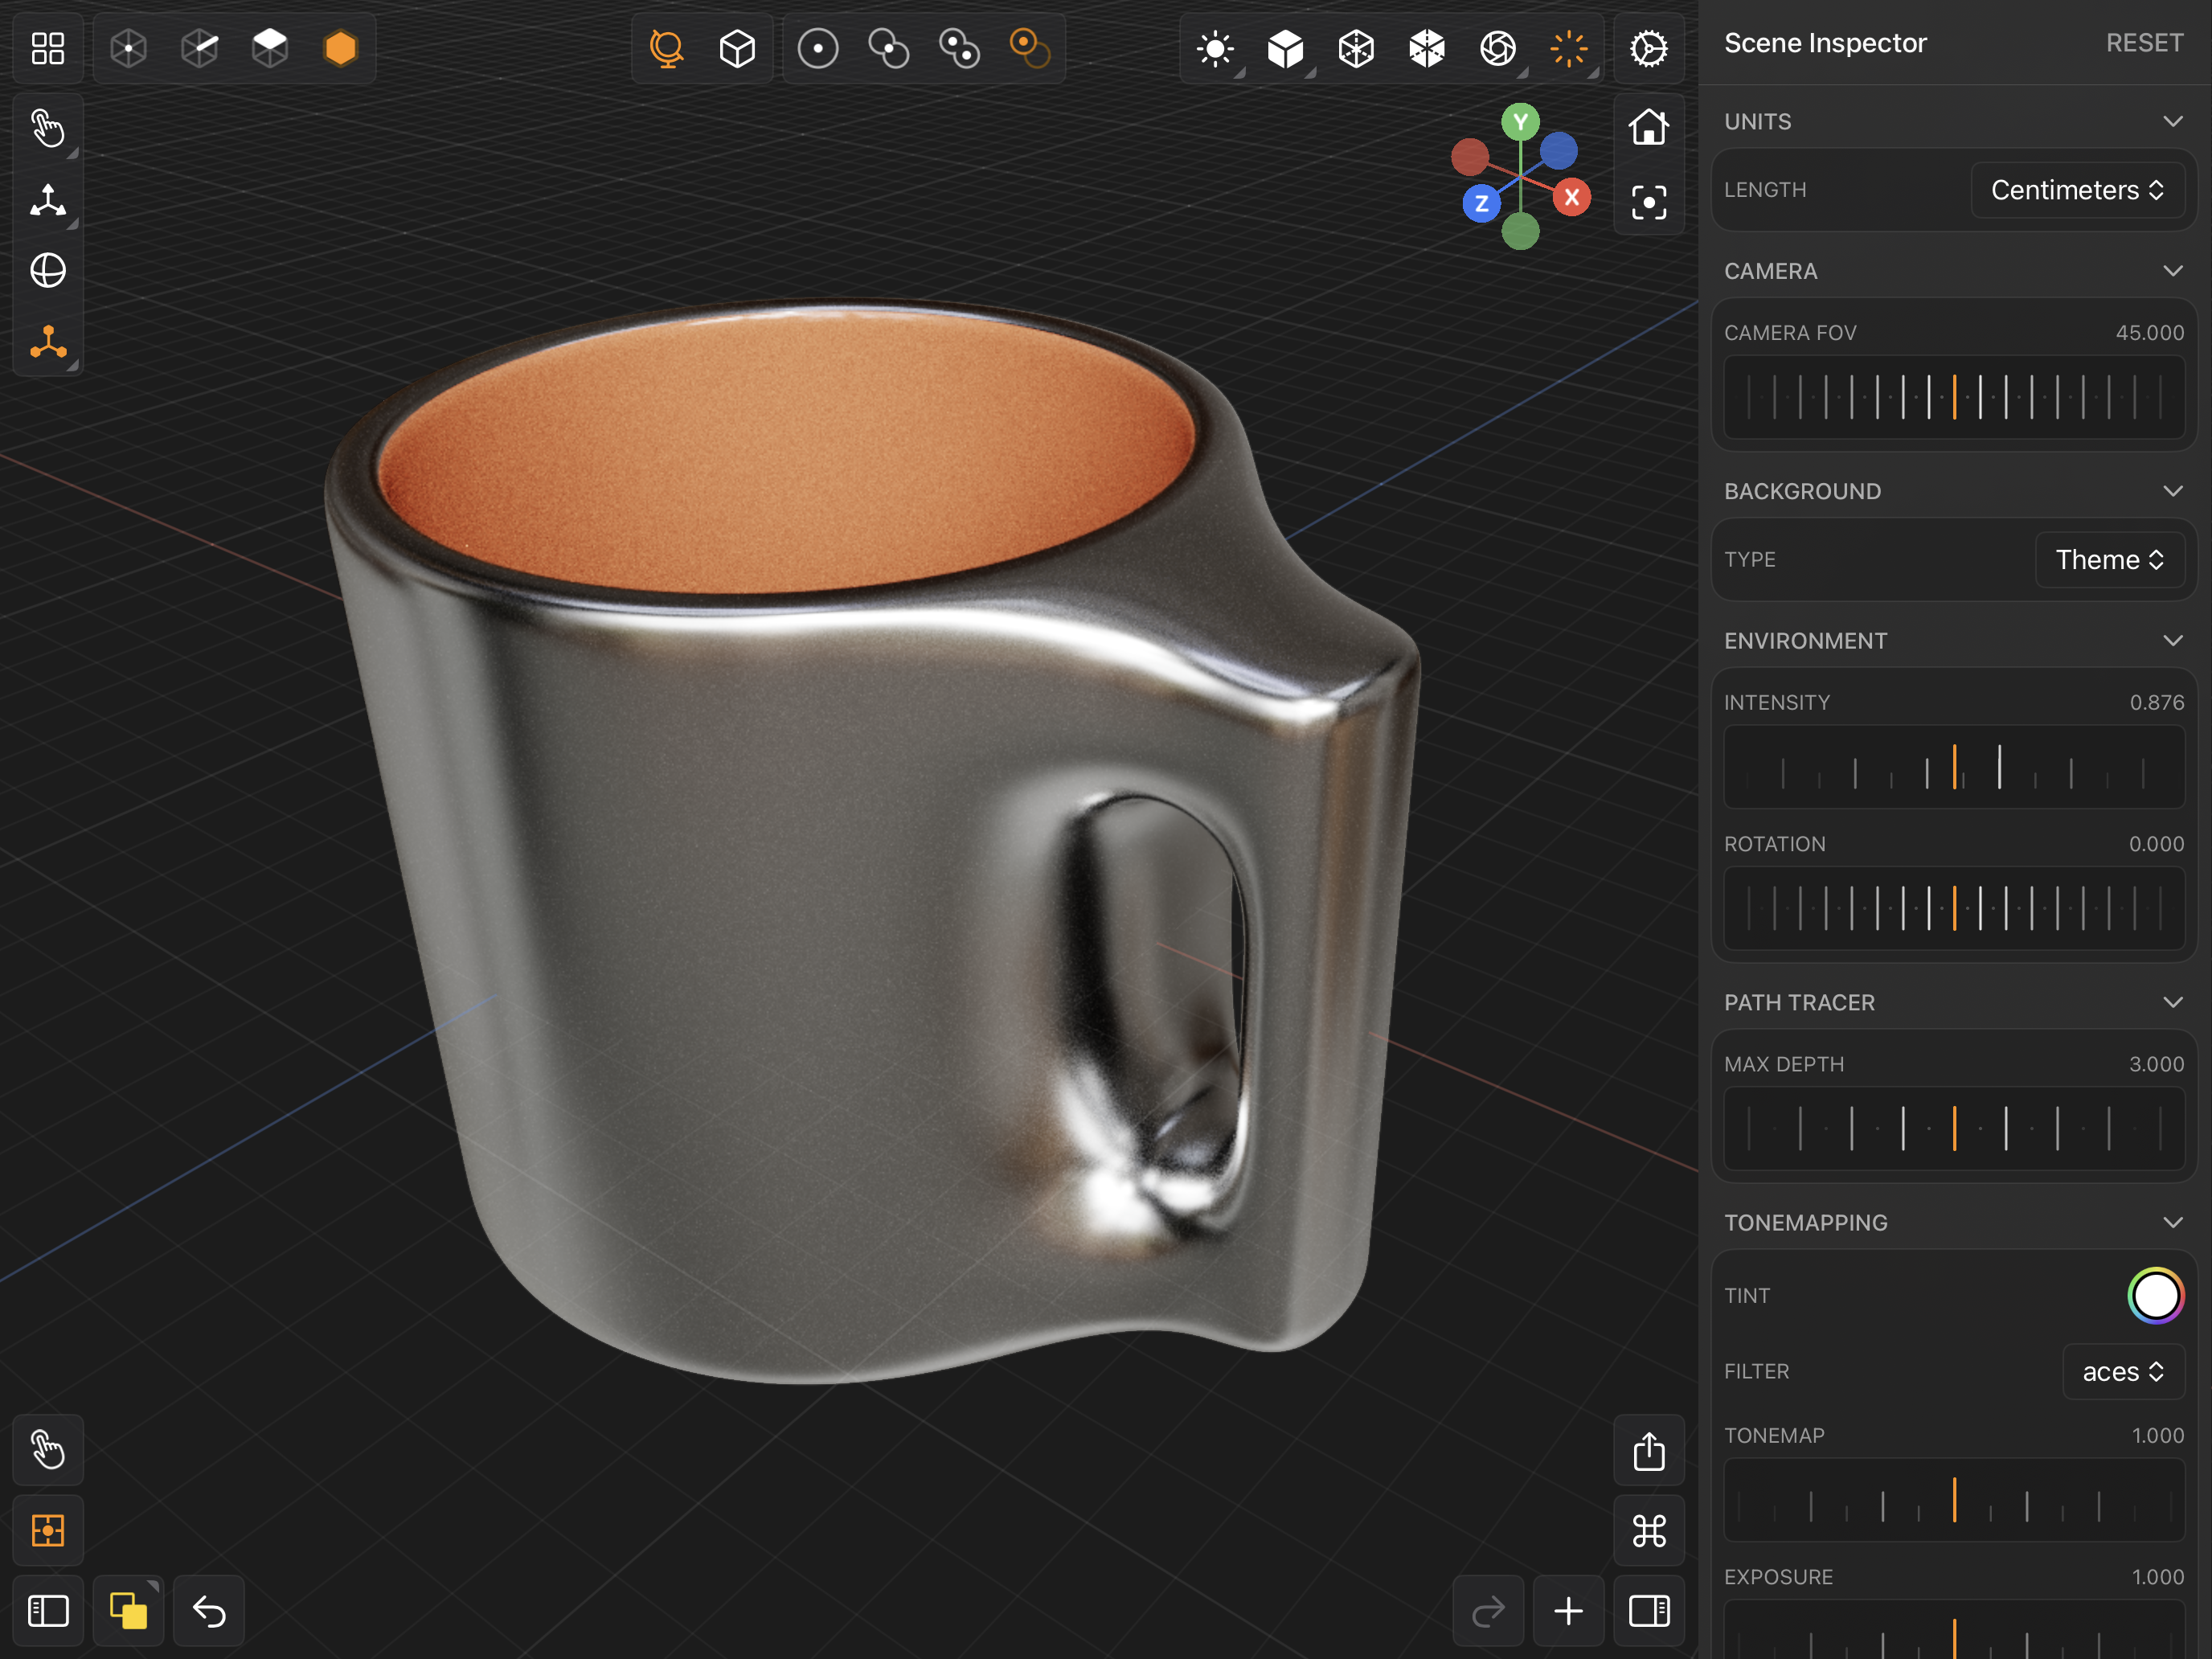
Ultimately, it's up to you to determine what scale you want to work in. You can configure the default units a new file is created with in the File Settings. There are a couple things to consider when working in this way:
Import Units
1. When I import a file, what units should I choose?
Import Sheet

When you import a 3D model, you'll be presented with an Import Options modal sheet that displays an option where you can set the Import Units of the file being imported.
USD and USDZ files record their own units. When you import one, the sheet instead offers a Convert Units To Match File toggle. Leave it on to have Valence 3D scale the model from its recorded units into your file's units; turn it off to bring the geometry in at its raw numbers.
Export Units
2. When I export a file, what units should I choose?
Export USD Sheet
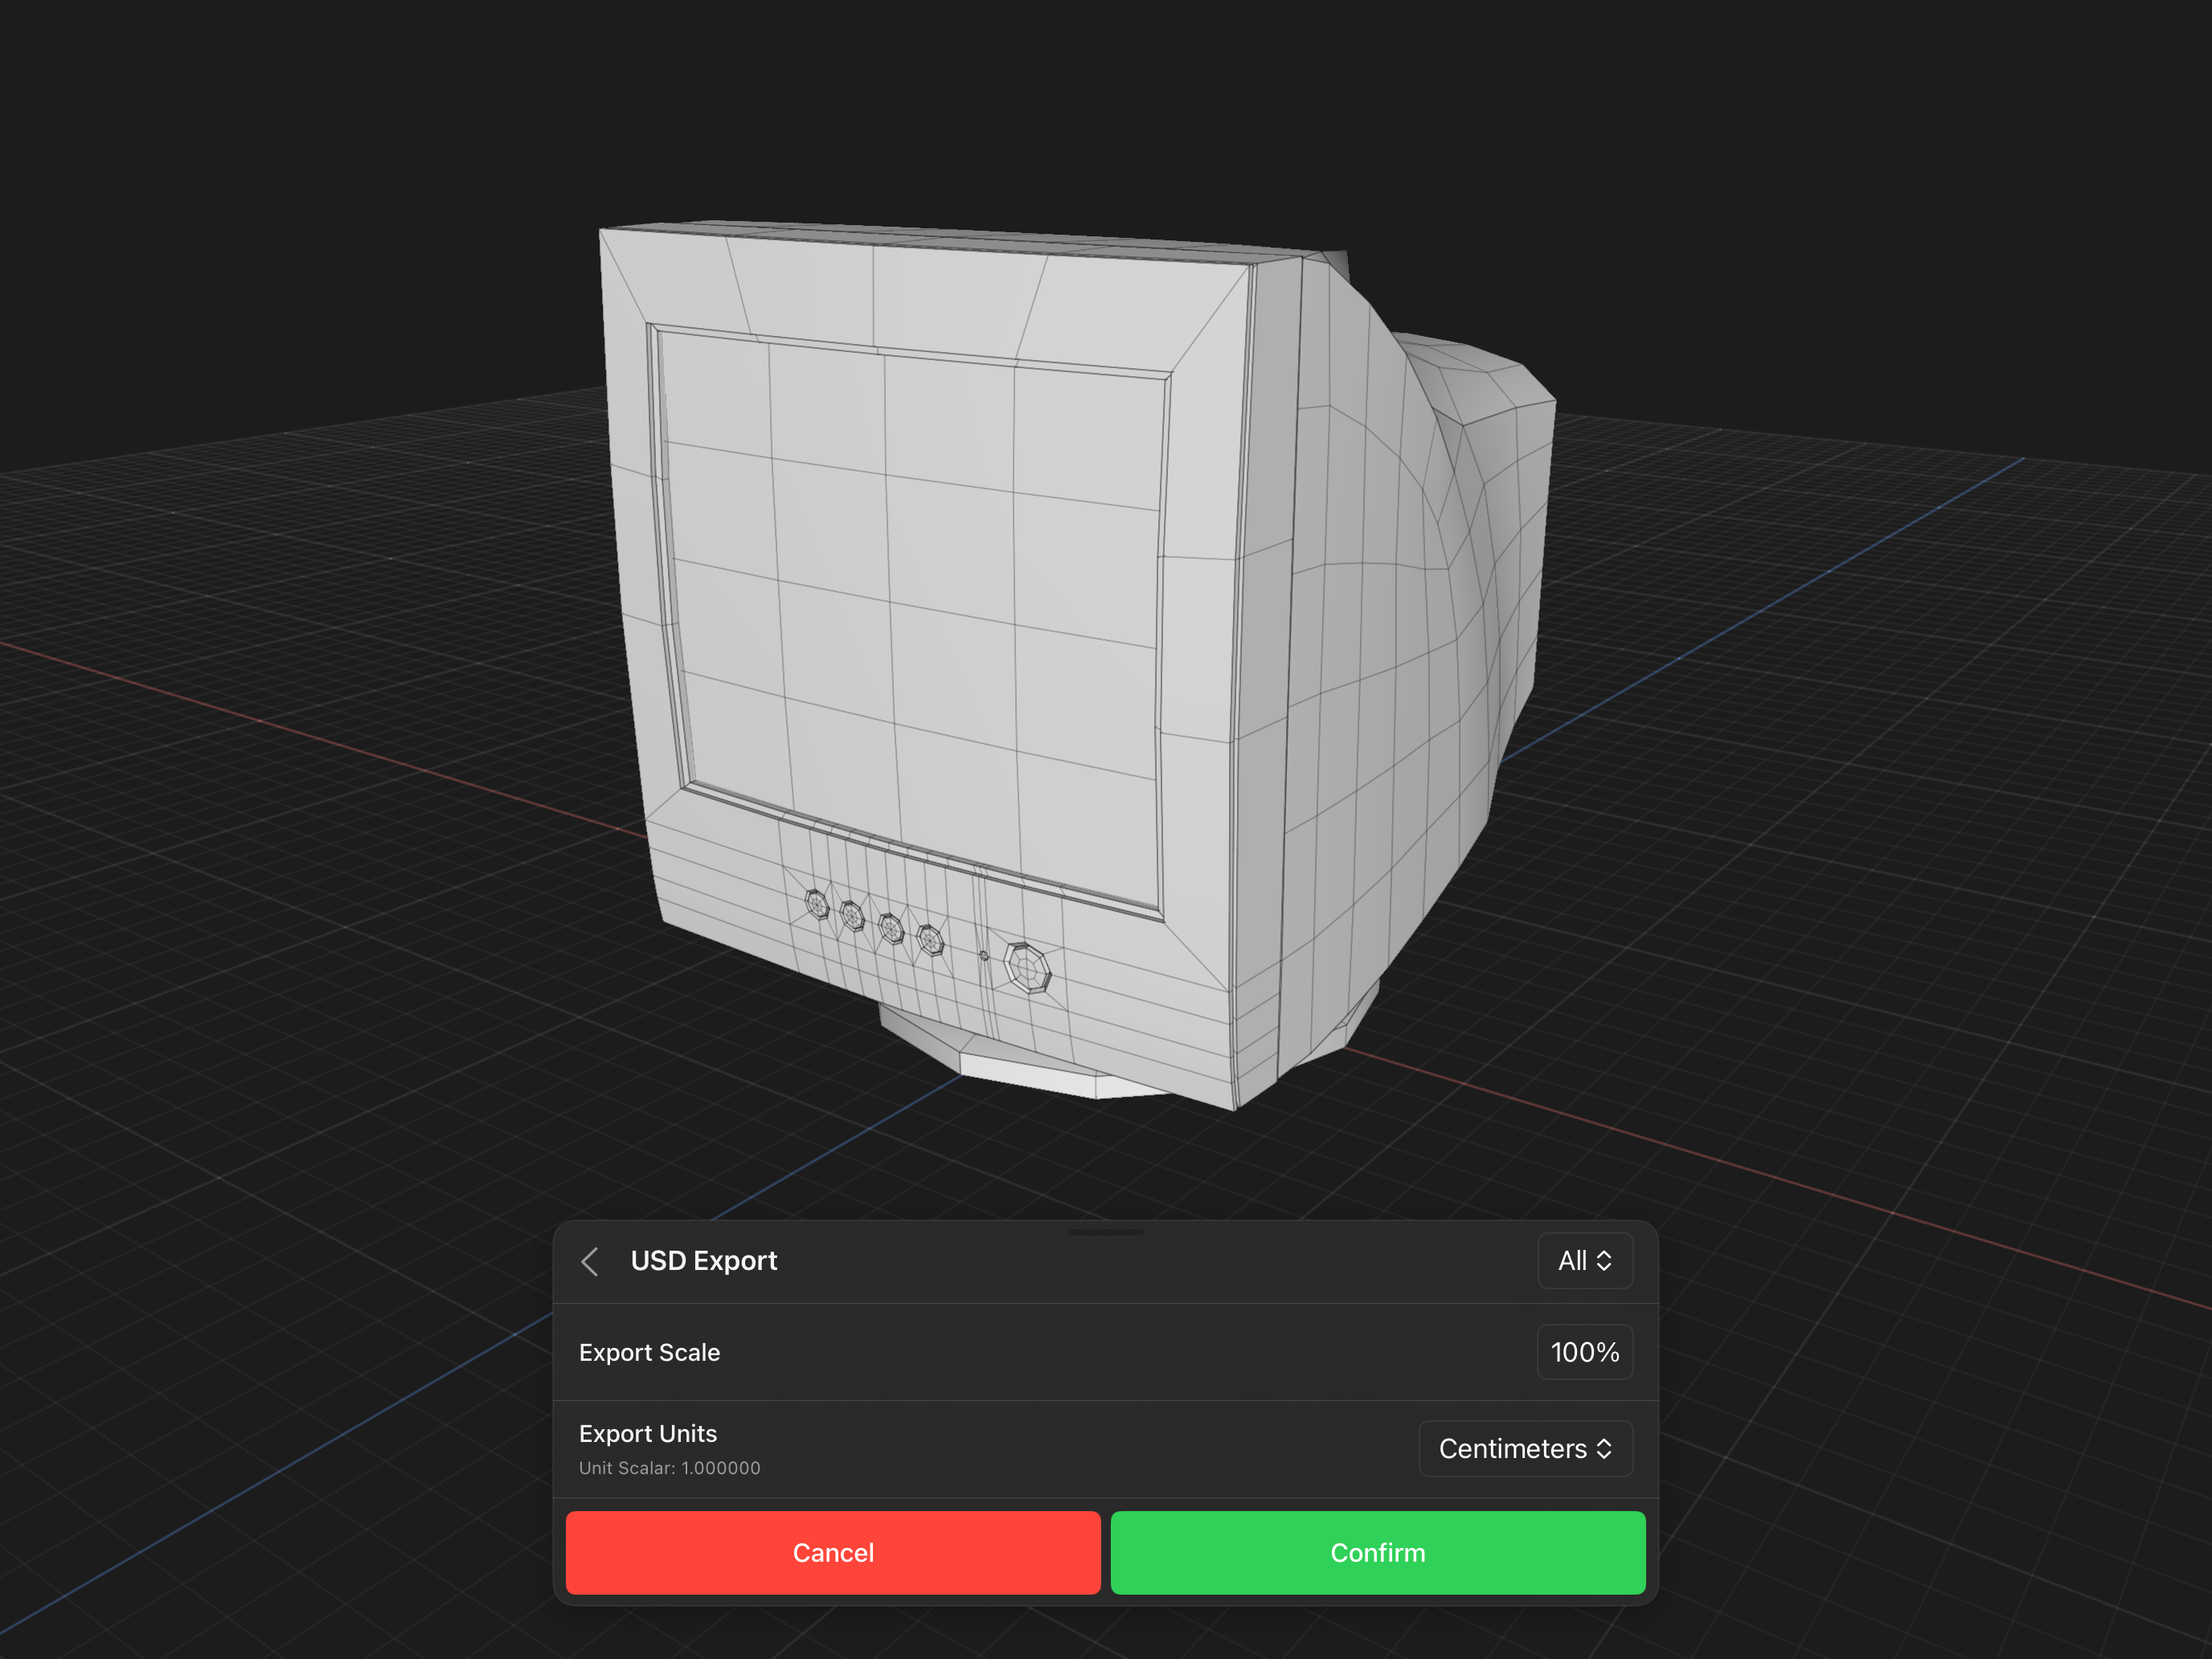
When you export a 3D file out of Valence using the Export Options, you'll be presented with a modal sheet that displays an option where you can set the Export Units of the file being exported.
Measurements
To measure a mesh or multiple meshes, you can toggle measurements in the Command Palette.
Tap this button to toggle measurements on or off.
Measurement Preview

When measurements are toggled on, Valence will show visual measurement indicators on bounding boxes in the scene that enclose the items in your selection.
- The blue local bounding box shows tight measurements of the Active Component.
- The pink world bounding box shows axis-aligned measurements of the entire selection.
Tap COPY in the measurement sheet's header to copy the measurements to the clipboard, so you can paste them into notes or a spec somewhere else. CLOSE dismisses the sheet.
The same figures appear as text in the Inspector's Mesh Information section.
Dimensions
Measurements give you the bounding box of whatever is selected. Dimensions are different: they are persistent annotations you place by hand between two specific points, and they stay in the scene as nodes until you delete them. Use them to call out the distances that actually matter on a model — a hole's spacing, a wall's thickness, the gap between two parts.
To start, open the Add Options sheet and choose Dimension.
Tap this button to start adding dimensions to the scene.
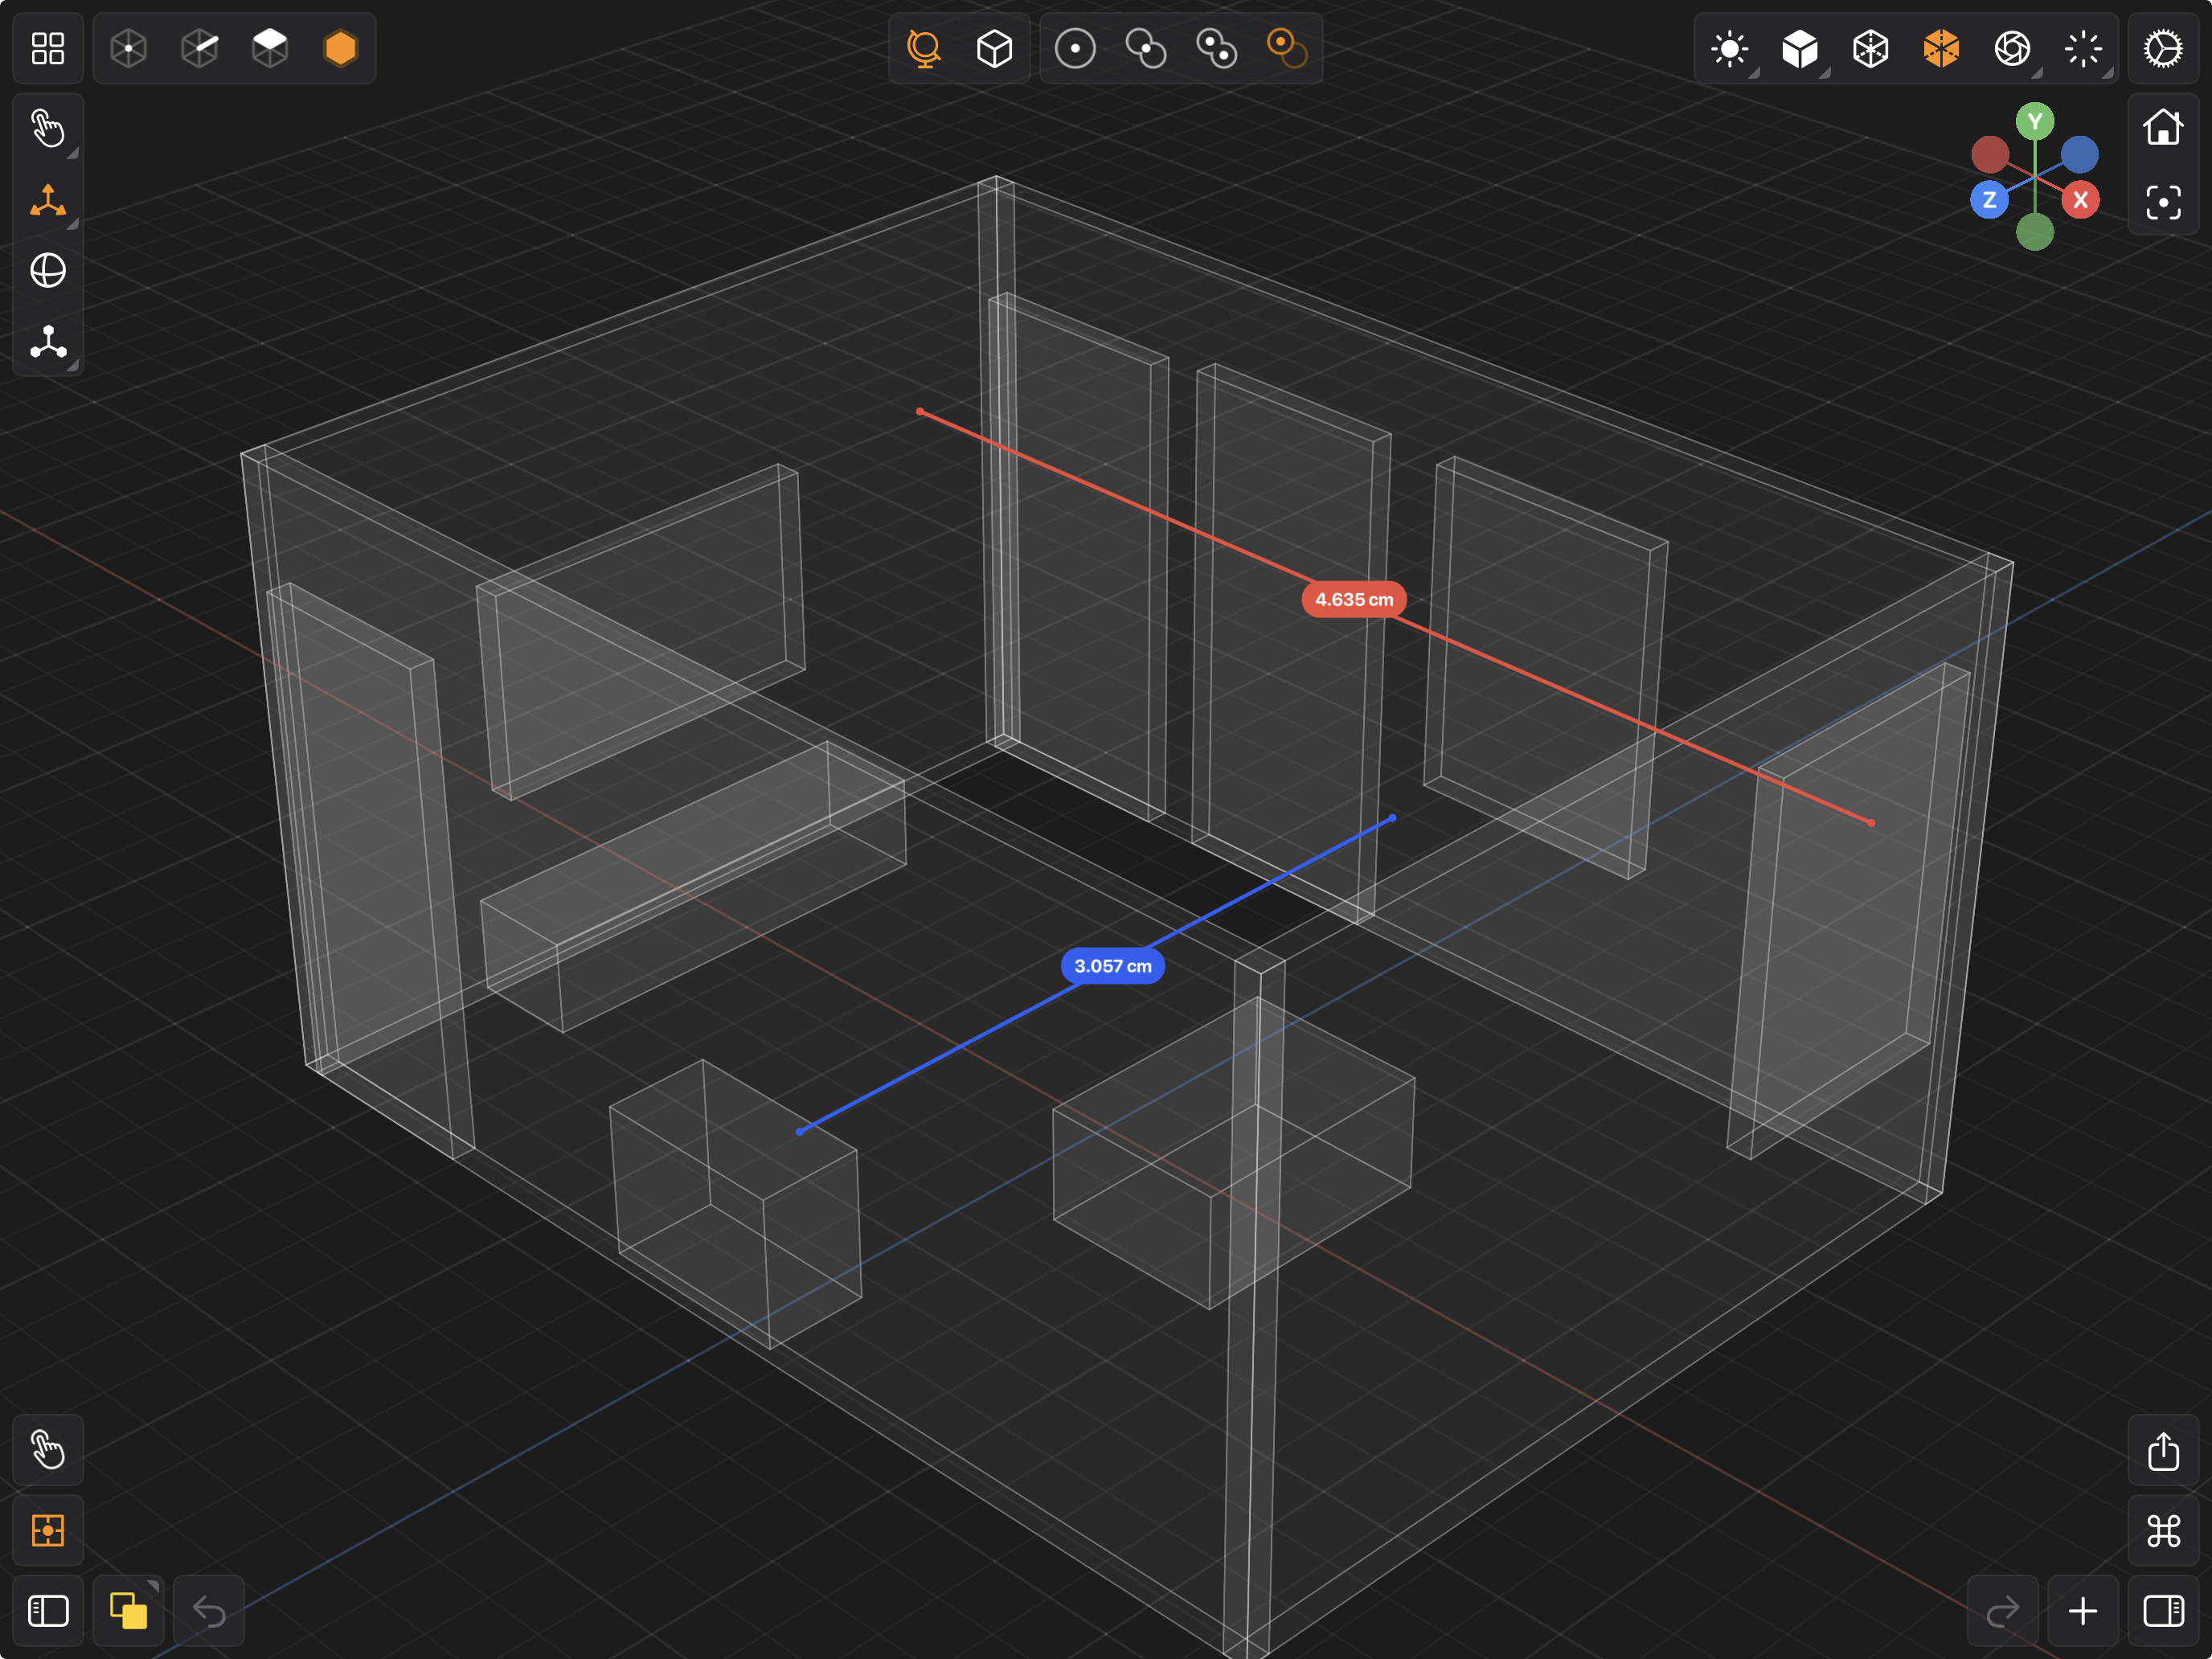
Dimensions in a Scene
Placing Points
Once you are in dimensioning mode, press down and hold on your model where you want a point. A ring fills around your finger as you hold, and the point is committed when the ring completes. If you move your finger while holding, the point is cancelled — so lift and try again if you miss.
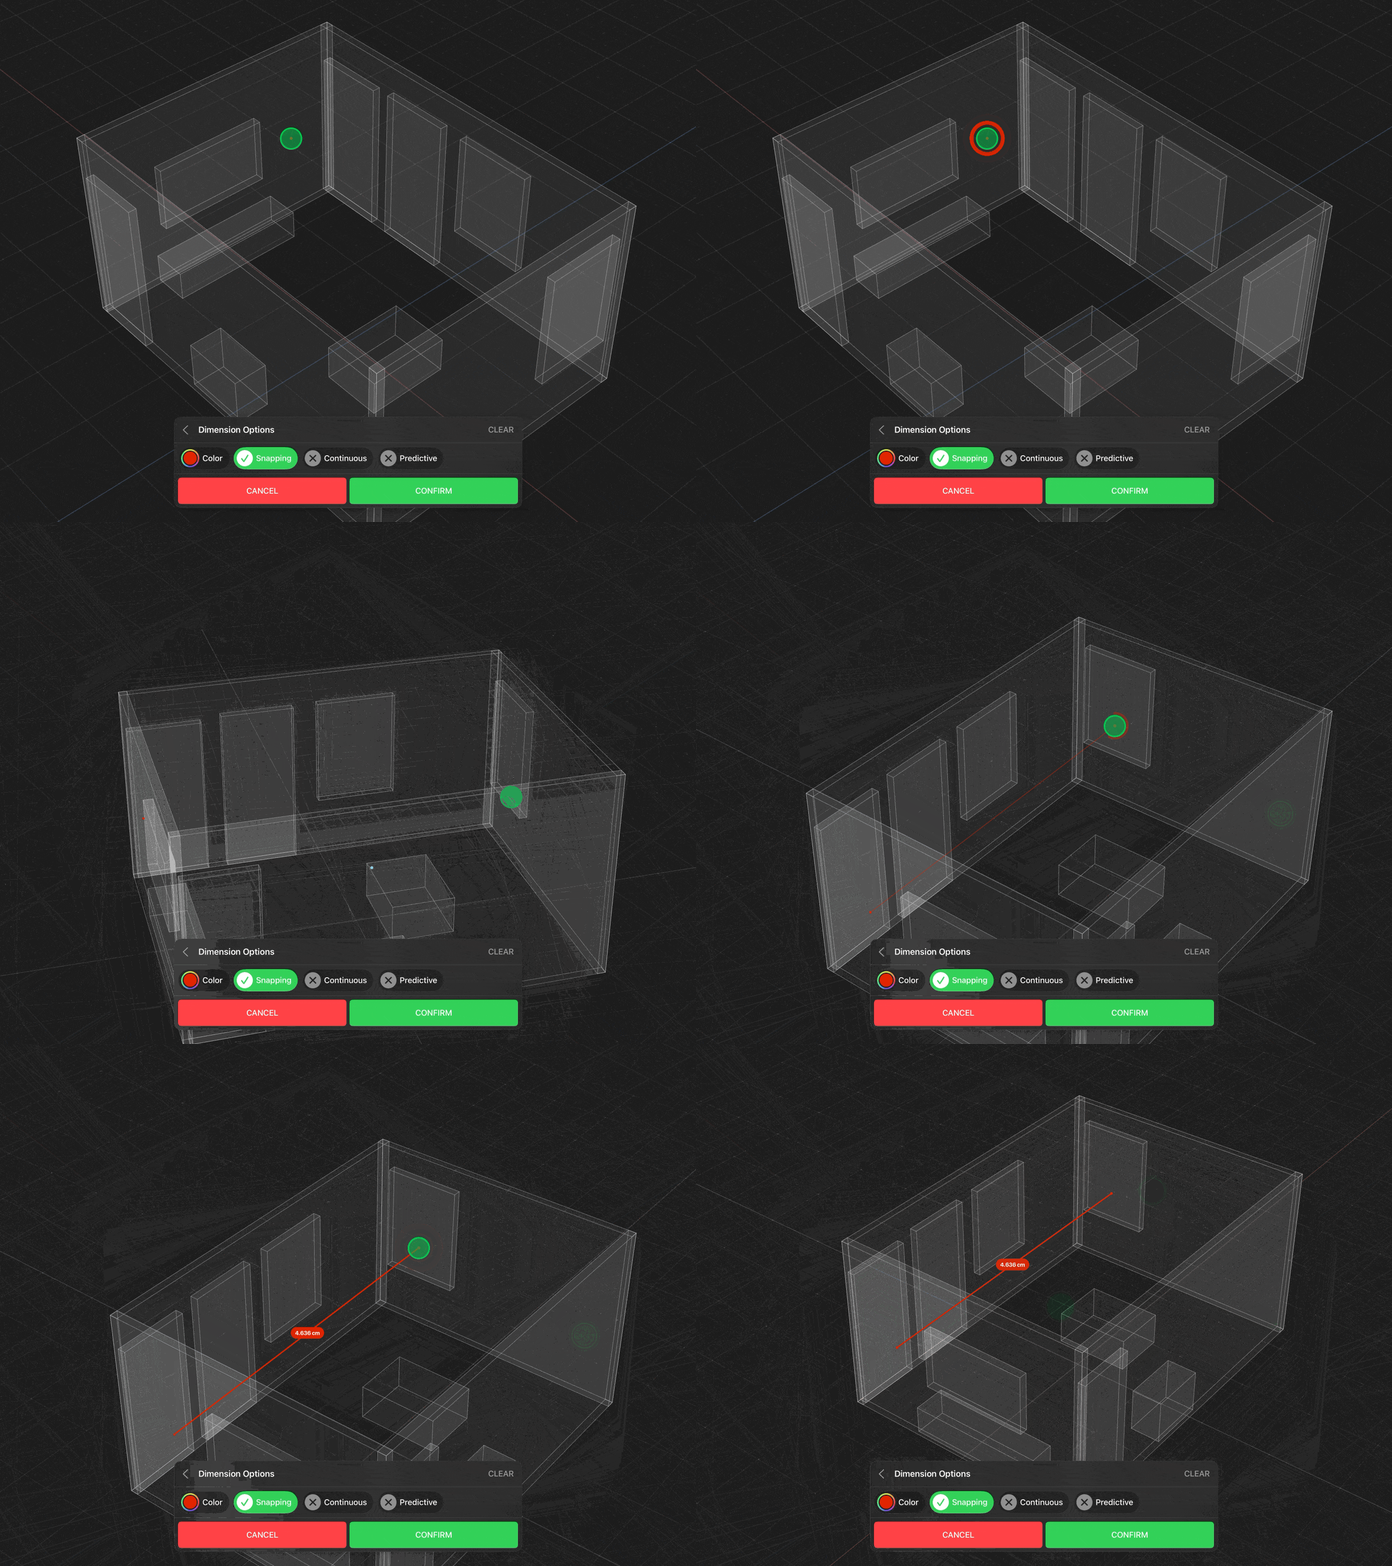
Points can only be placed on a mesh's surface. Pressing on empty space or on the grid does nothing.
Each two points make one dimension, drawn as a line with the distance labelled at its midpoint. Keep going to place as many dimensions as you need, then tap the green confirm button to add them all to the scene. Tapping cancel, or swiping the sheet away, discards everything you placed.
Tap CLEAR in the sheet's header to throw away the points you have placed so far without leaving dimensioning mode.
Dimension Options
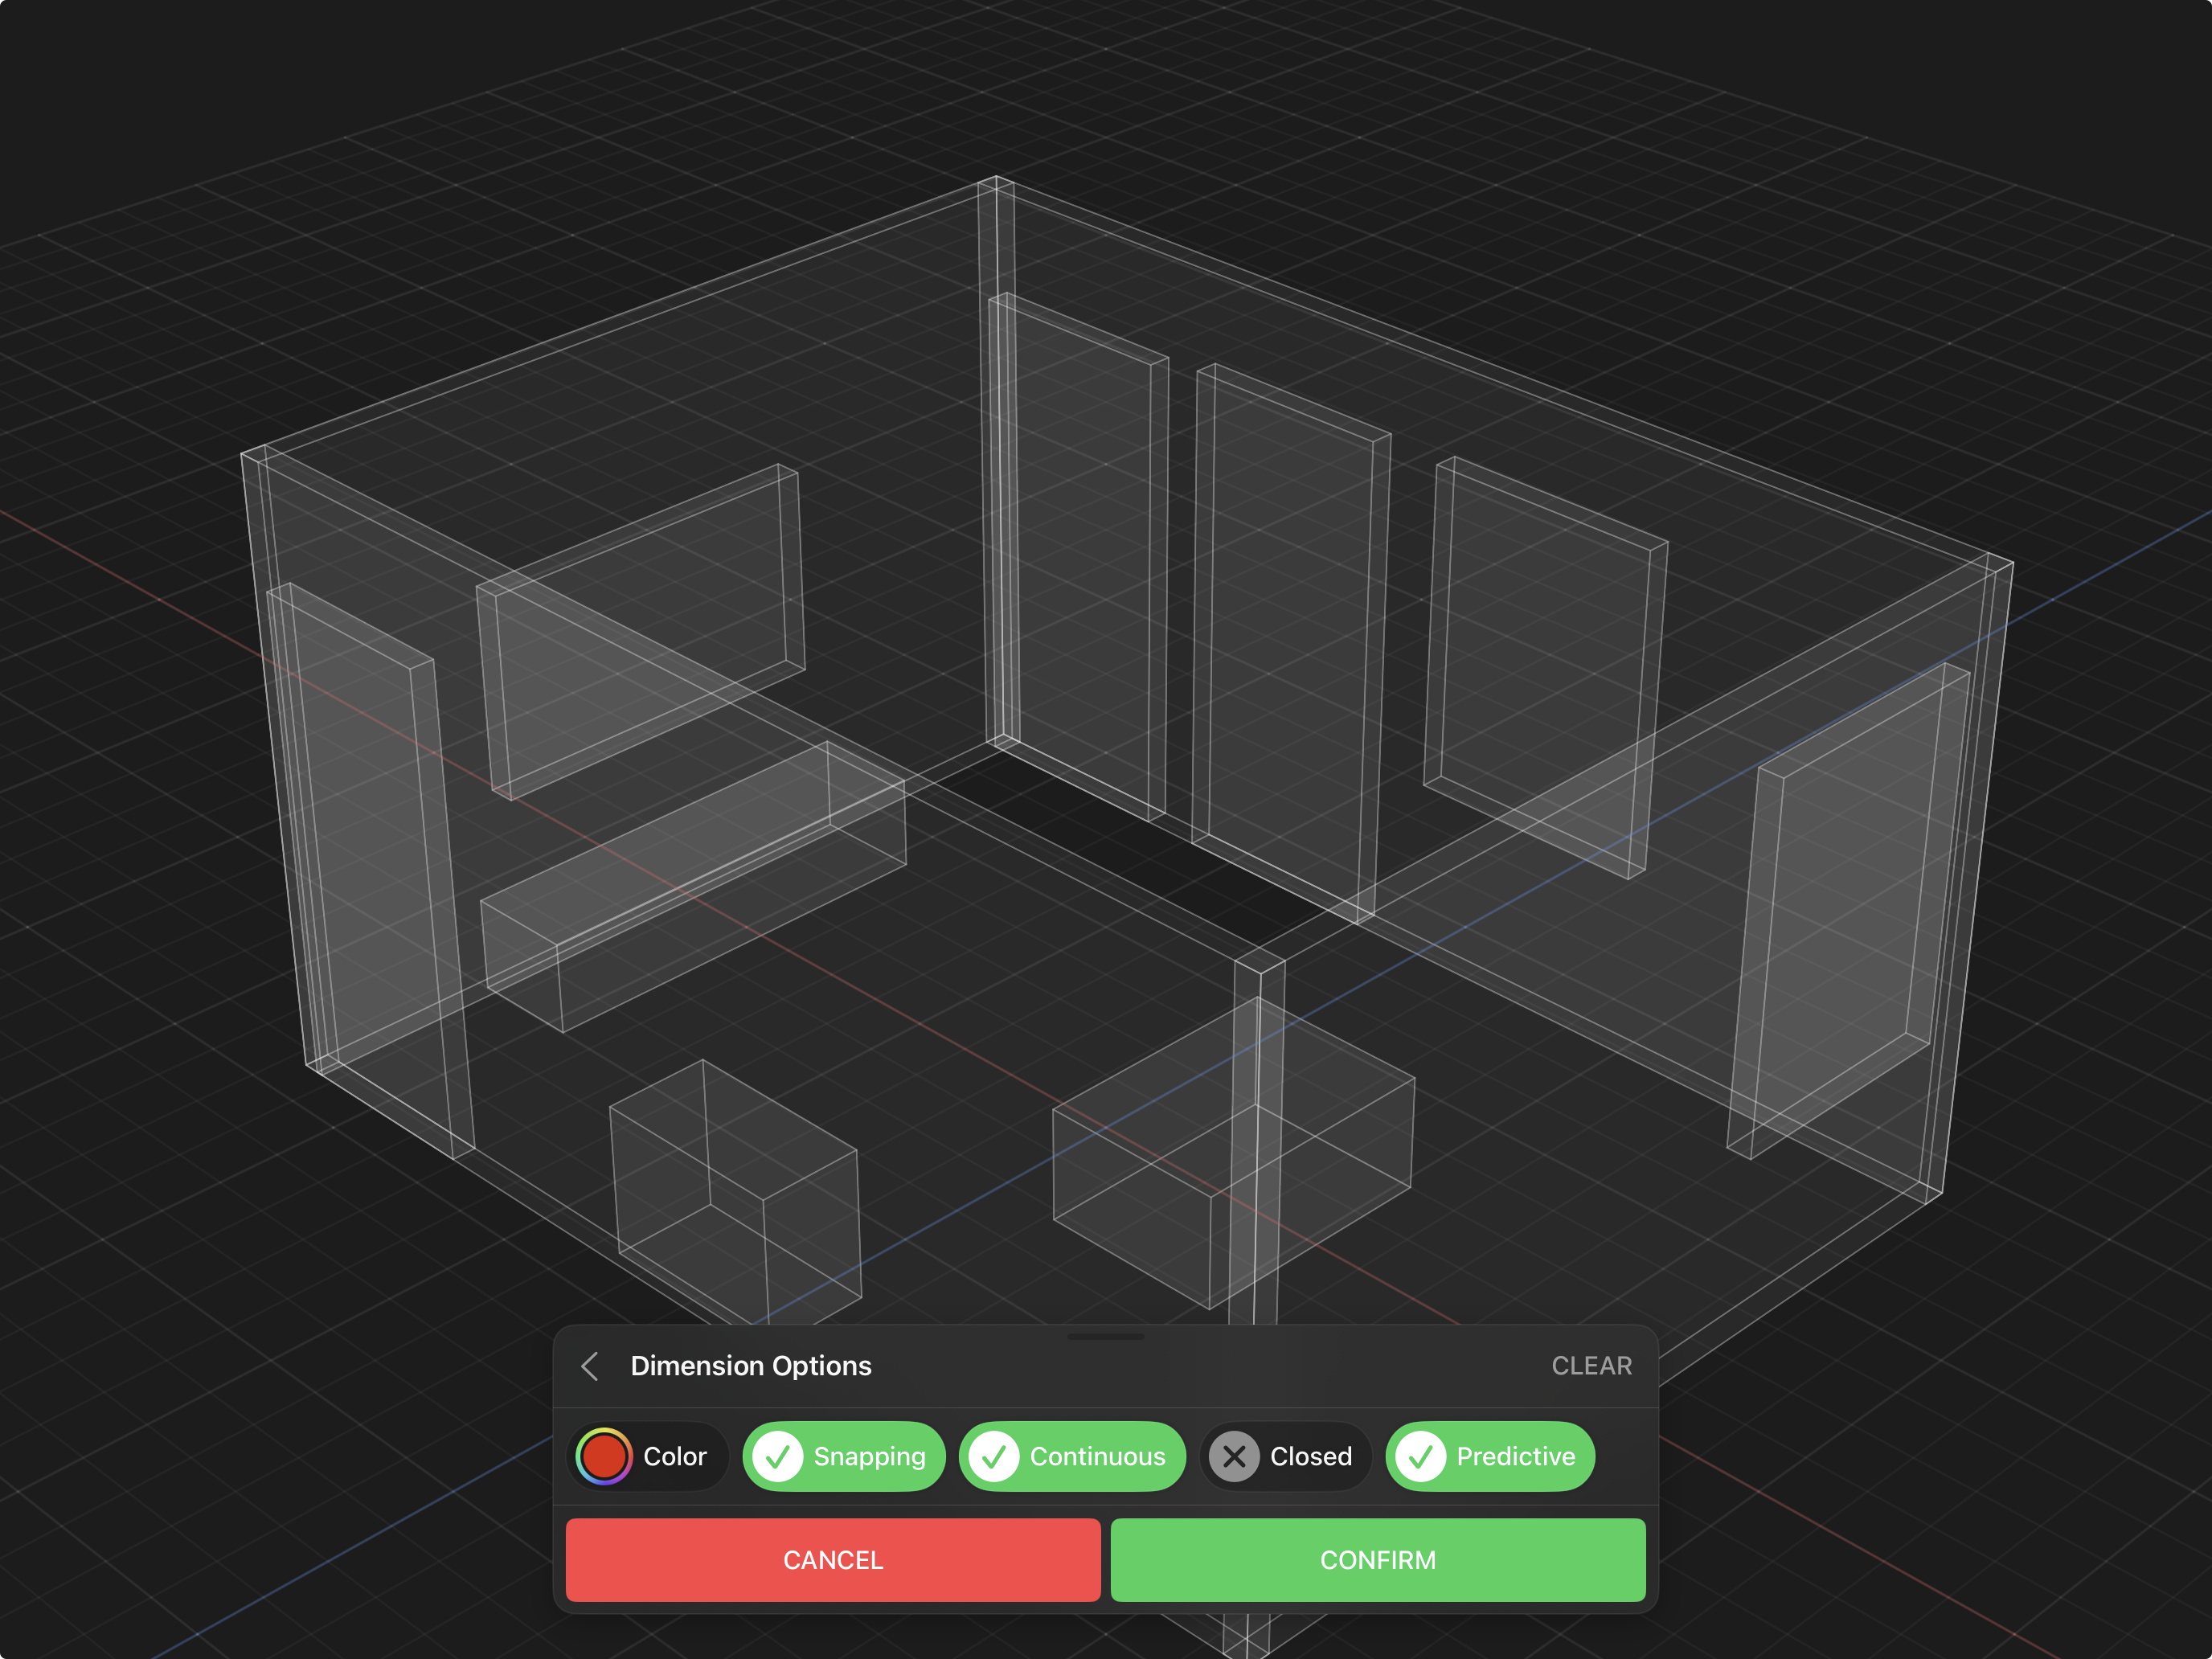
The Dimension Options sheet holds five controls.
- Color — the color of the dimensions you are about to create. Set it before placing points.
- Snapping — on by default. Snaps each point to the nearest vertex, edge midpoint or face center on the face you are pressing, as long as one is close enough on screen. This is what lets you measure corner-to-corner exactly instead of approximately. Turn it off to place points anywhere on a surface.
- Continuous — off by default. With it off, points are consumed in pairs: the first two points make one dimension, the next two make another, and so on. Turn it on to chain dimensions instead, so each new point connects to the previous one — useful for measuring along a run of several features.
- Closed — off by default, and only shown when Continuous is on. Adds one more dimension joining the last point back to the first, closing the chain into a loop. It only takes effect once you have more than two points.
- Predictive — on by default. After you place a point, Valence 3D casts a ray straight through the surface along its normal and, if it finds the other side, previews a second point there with a tap to add label. Tapping that label measures the thickness of the geometry at that spot without hunting for the matching point on the far surface.
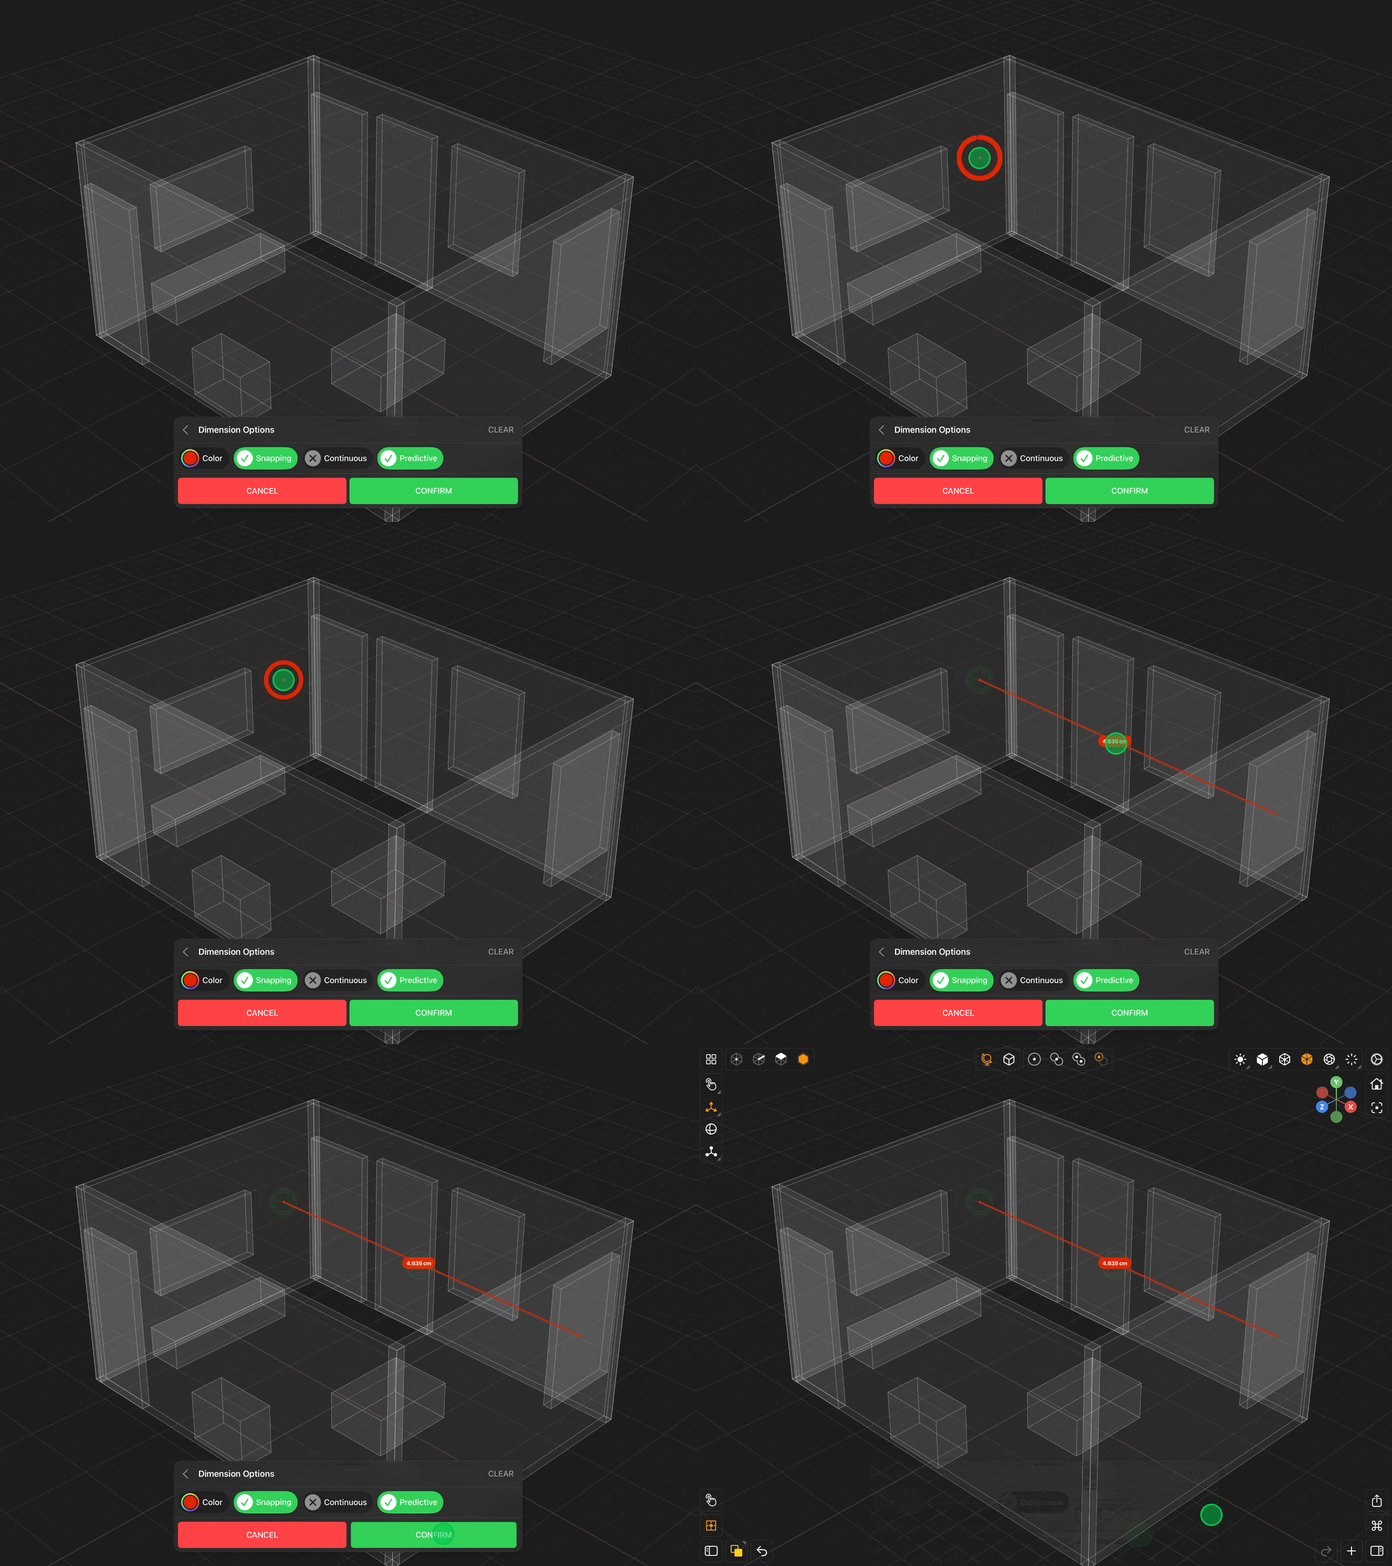
Snapping here is specific to dimensioning and is separate from the Snapping used by the modeling tools.
Reading & Editing Dimensions
A dimension's label shows the world space distance between its two points, to three decimal places, in the file's current units.
Because the distance is measured in world space, scaling a mesh changes what its dimensions read. Change the file's unit in the Scene Inspector and every dimension's label is relabelled immediately — the geometry is not rescaled, so a dimension reading 10.000 cm becomes 100.000 mm.
Once confirmed, each dimension is a node in your scene, which means you can:
- Select it by tapping it, and move, rotate or scale it with the tools like any other node.
- Rename, hide, lock or delete it from the Outliner.
- Change its COLOR in the Inspector's Display Options.
Adding dimensions is a single undoable step — one Undo removes everything you confirmed together.